Trailer mountable stereo system

Hey yah, so sometimes you want to listen to music with a dozen friends but can’t agree on who gets to haul all the gear. For those times, why not have a sound system that can easily drop into a bike trailer bed?

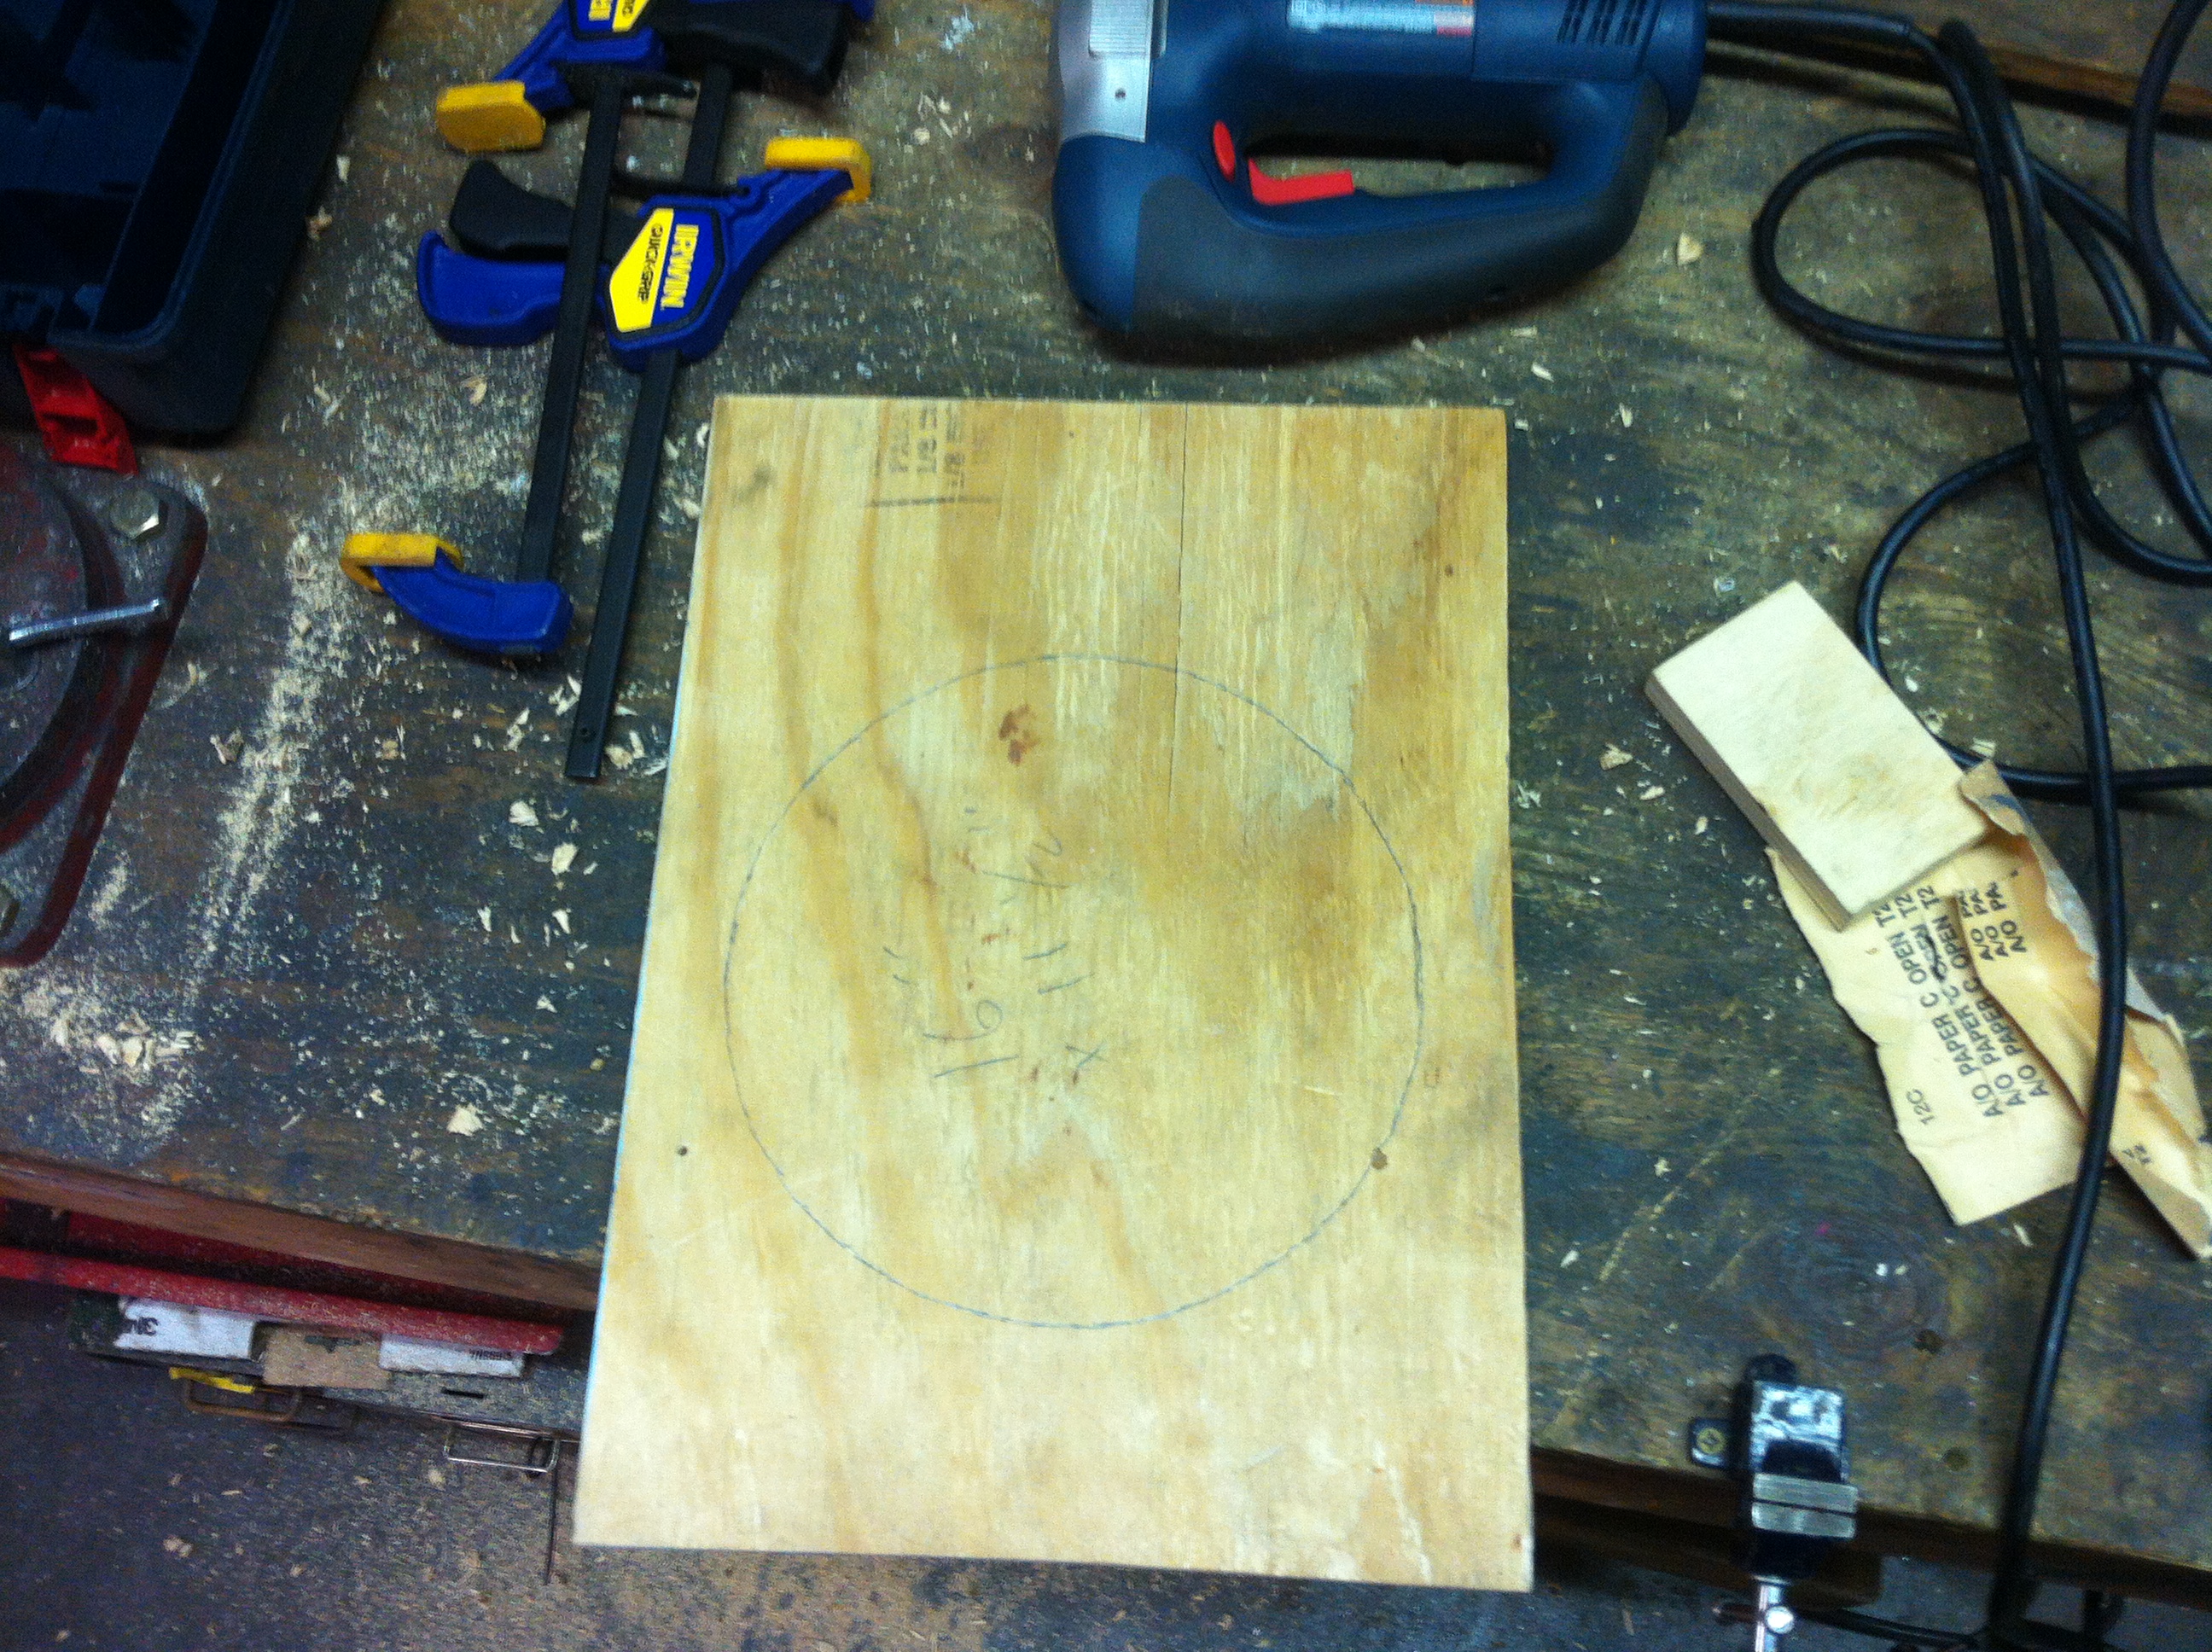
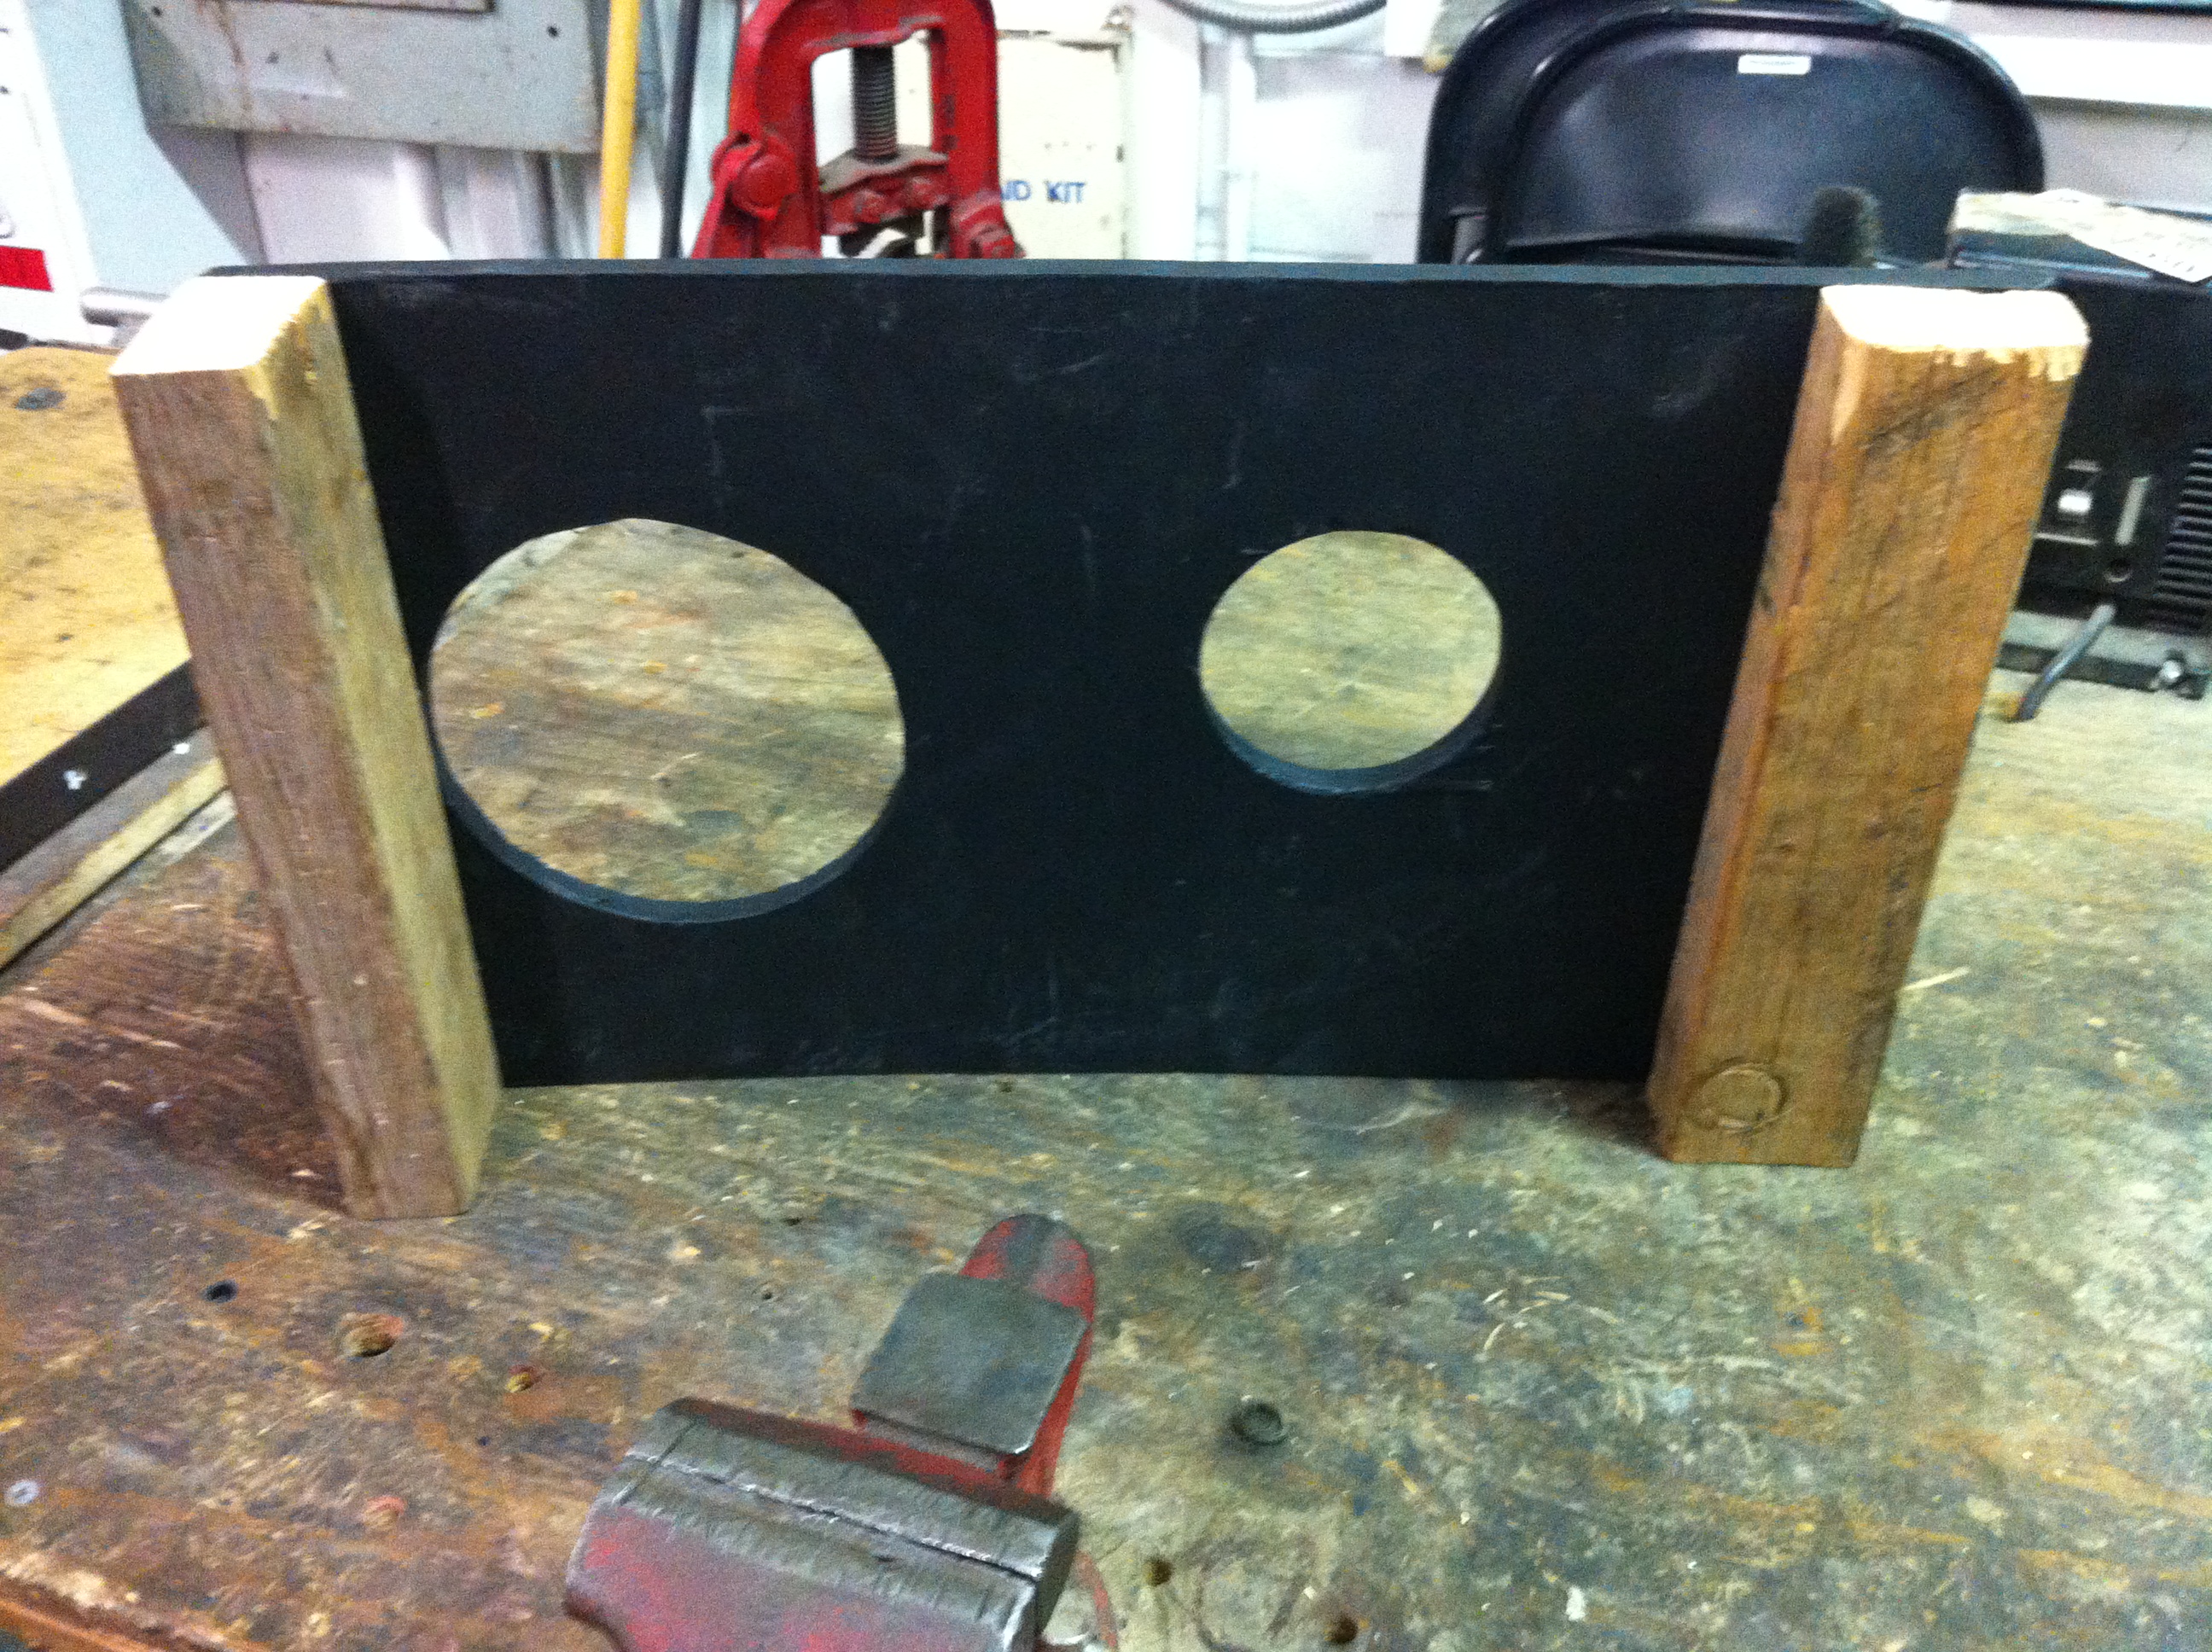
I started with some plywood and drew circles to mark cutouts for speakers:

01 - plywood

Painted it black, then built up the sides with 2x4s:

02 - side

and made a box:

03 - box framed

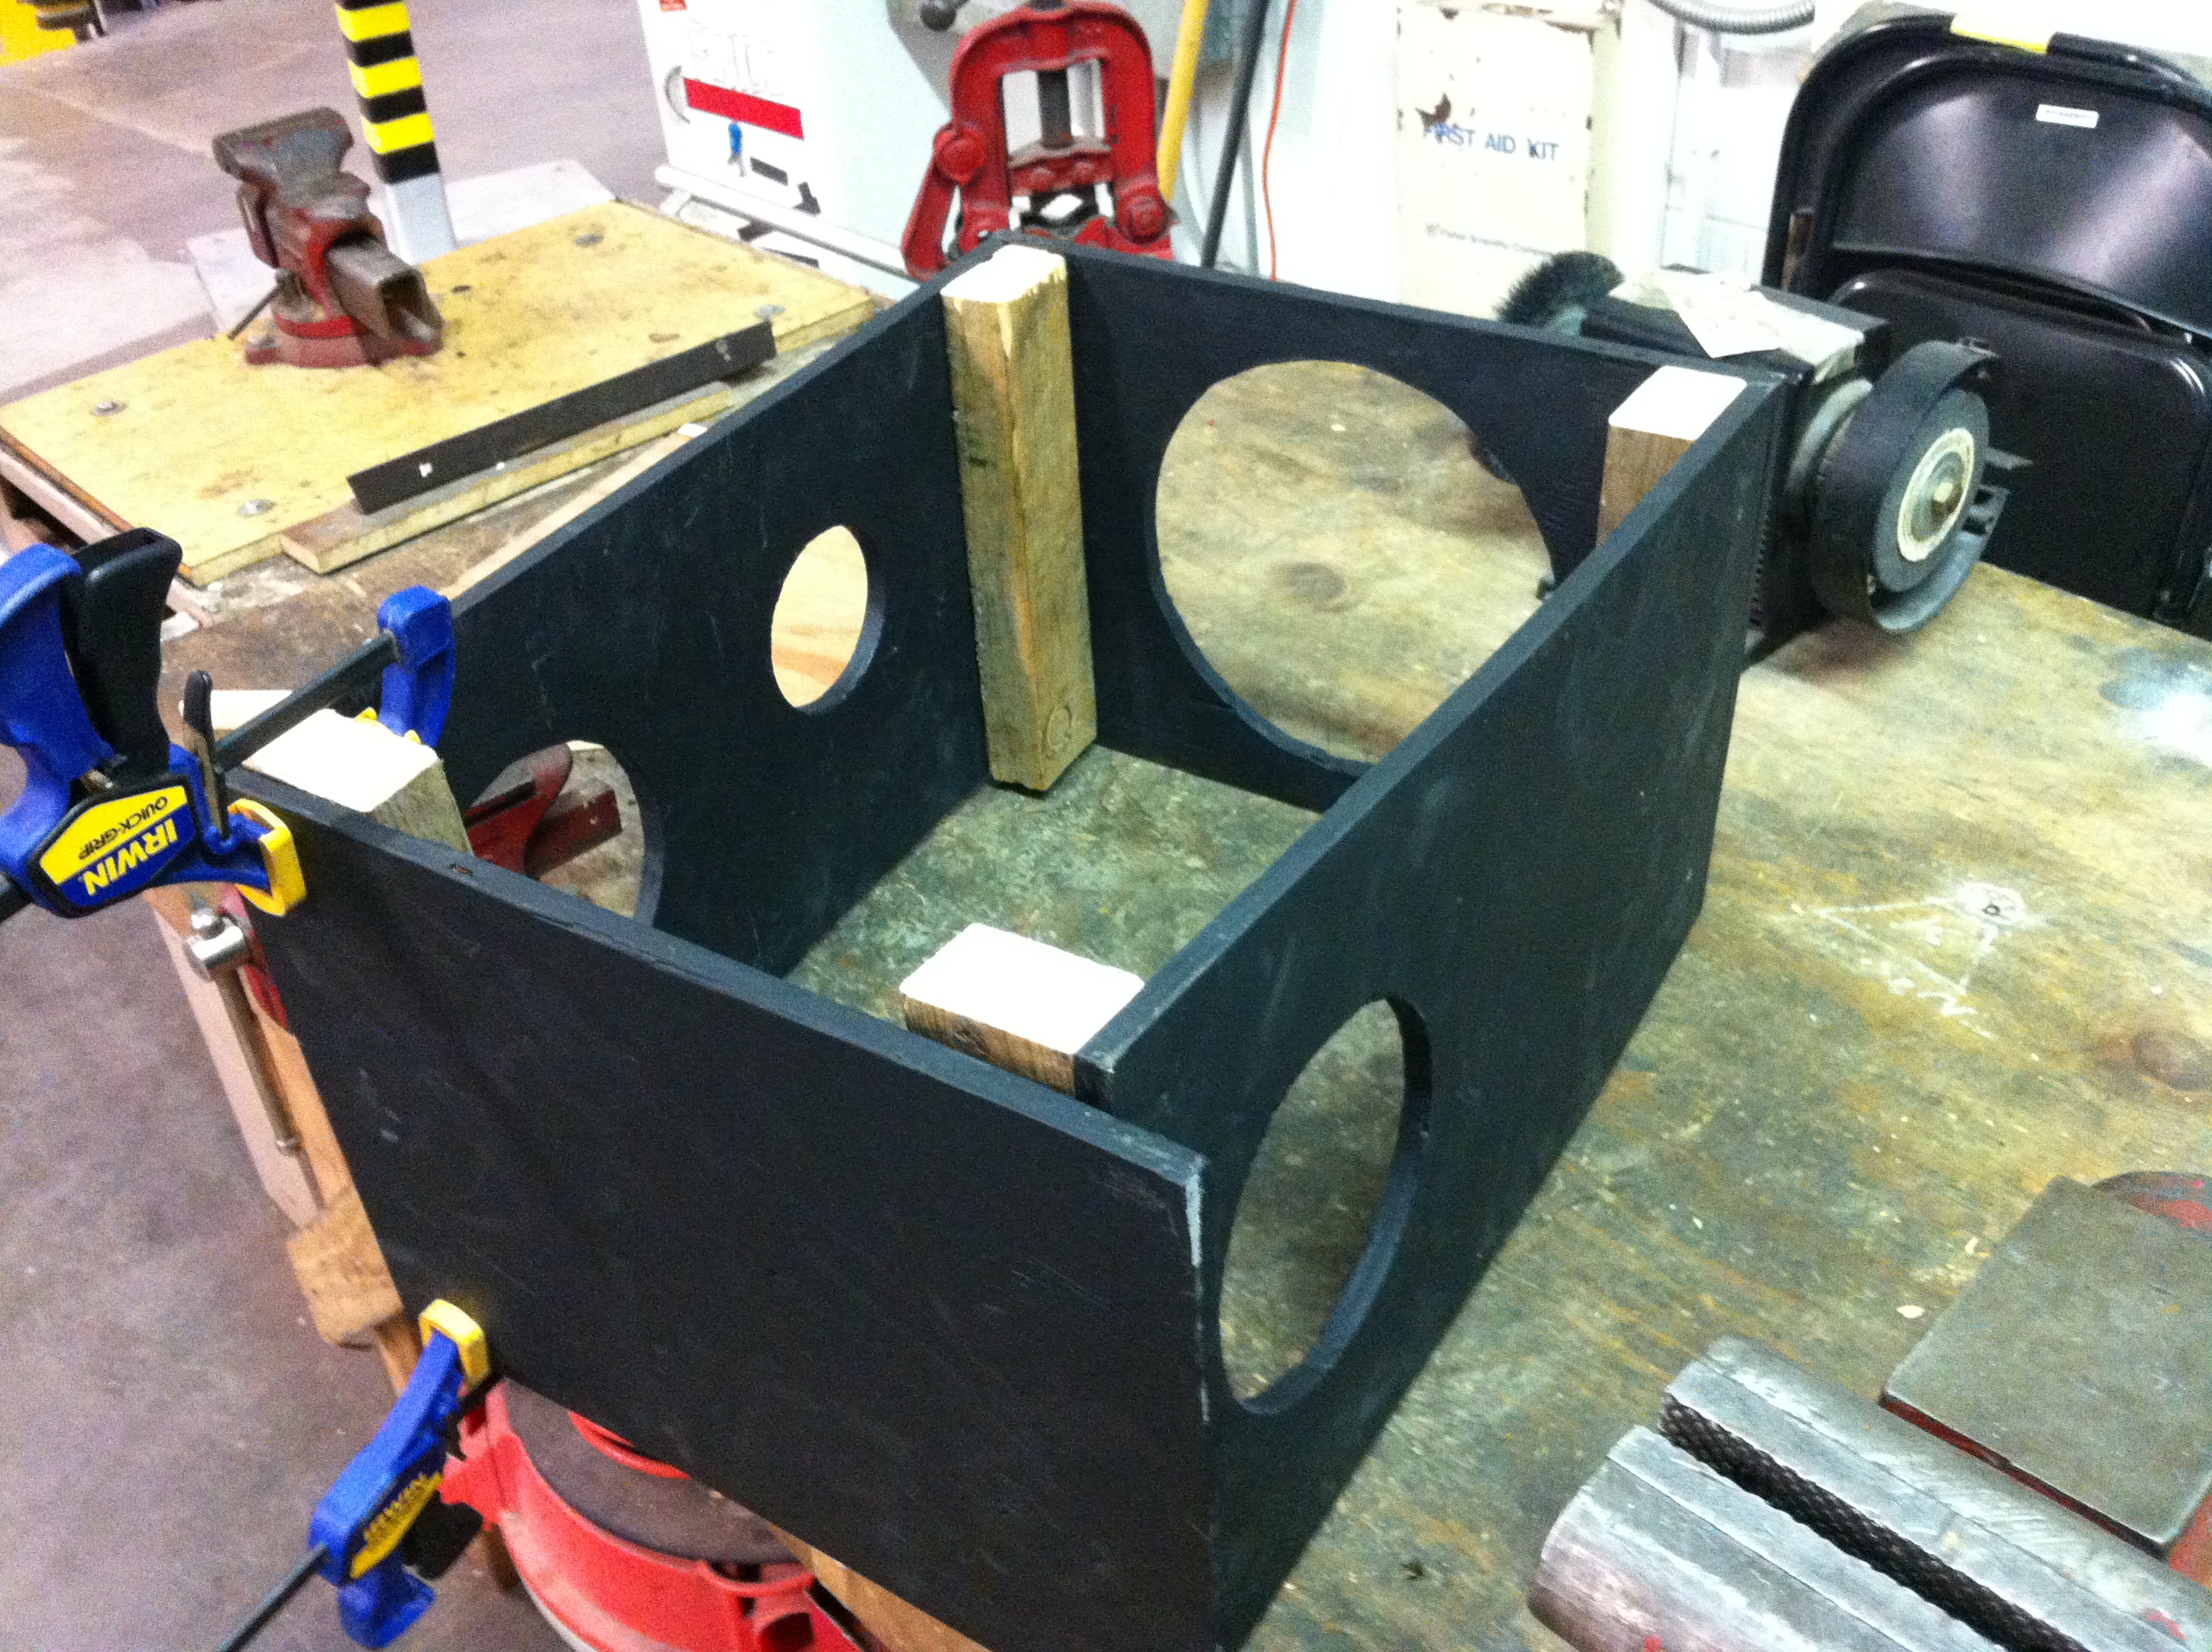
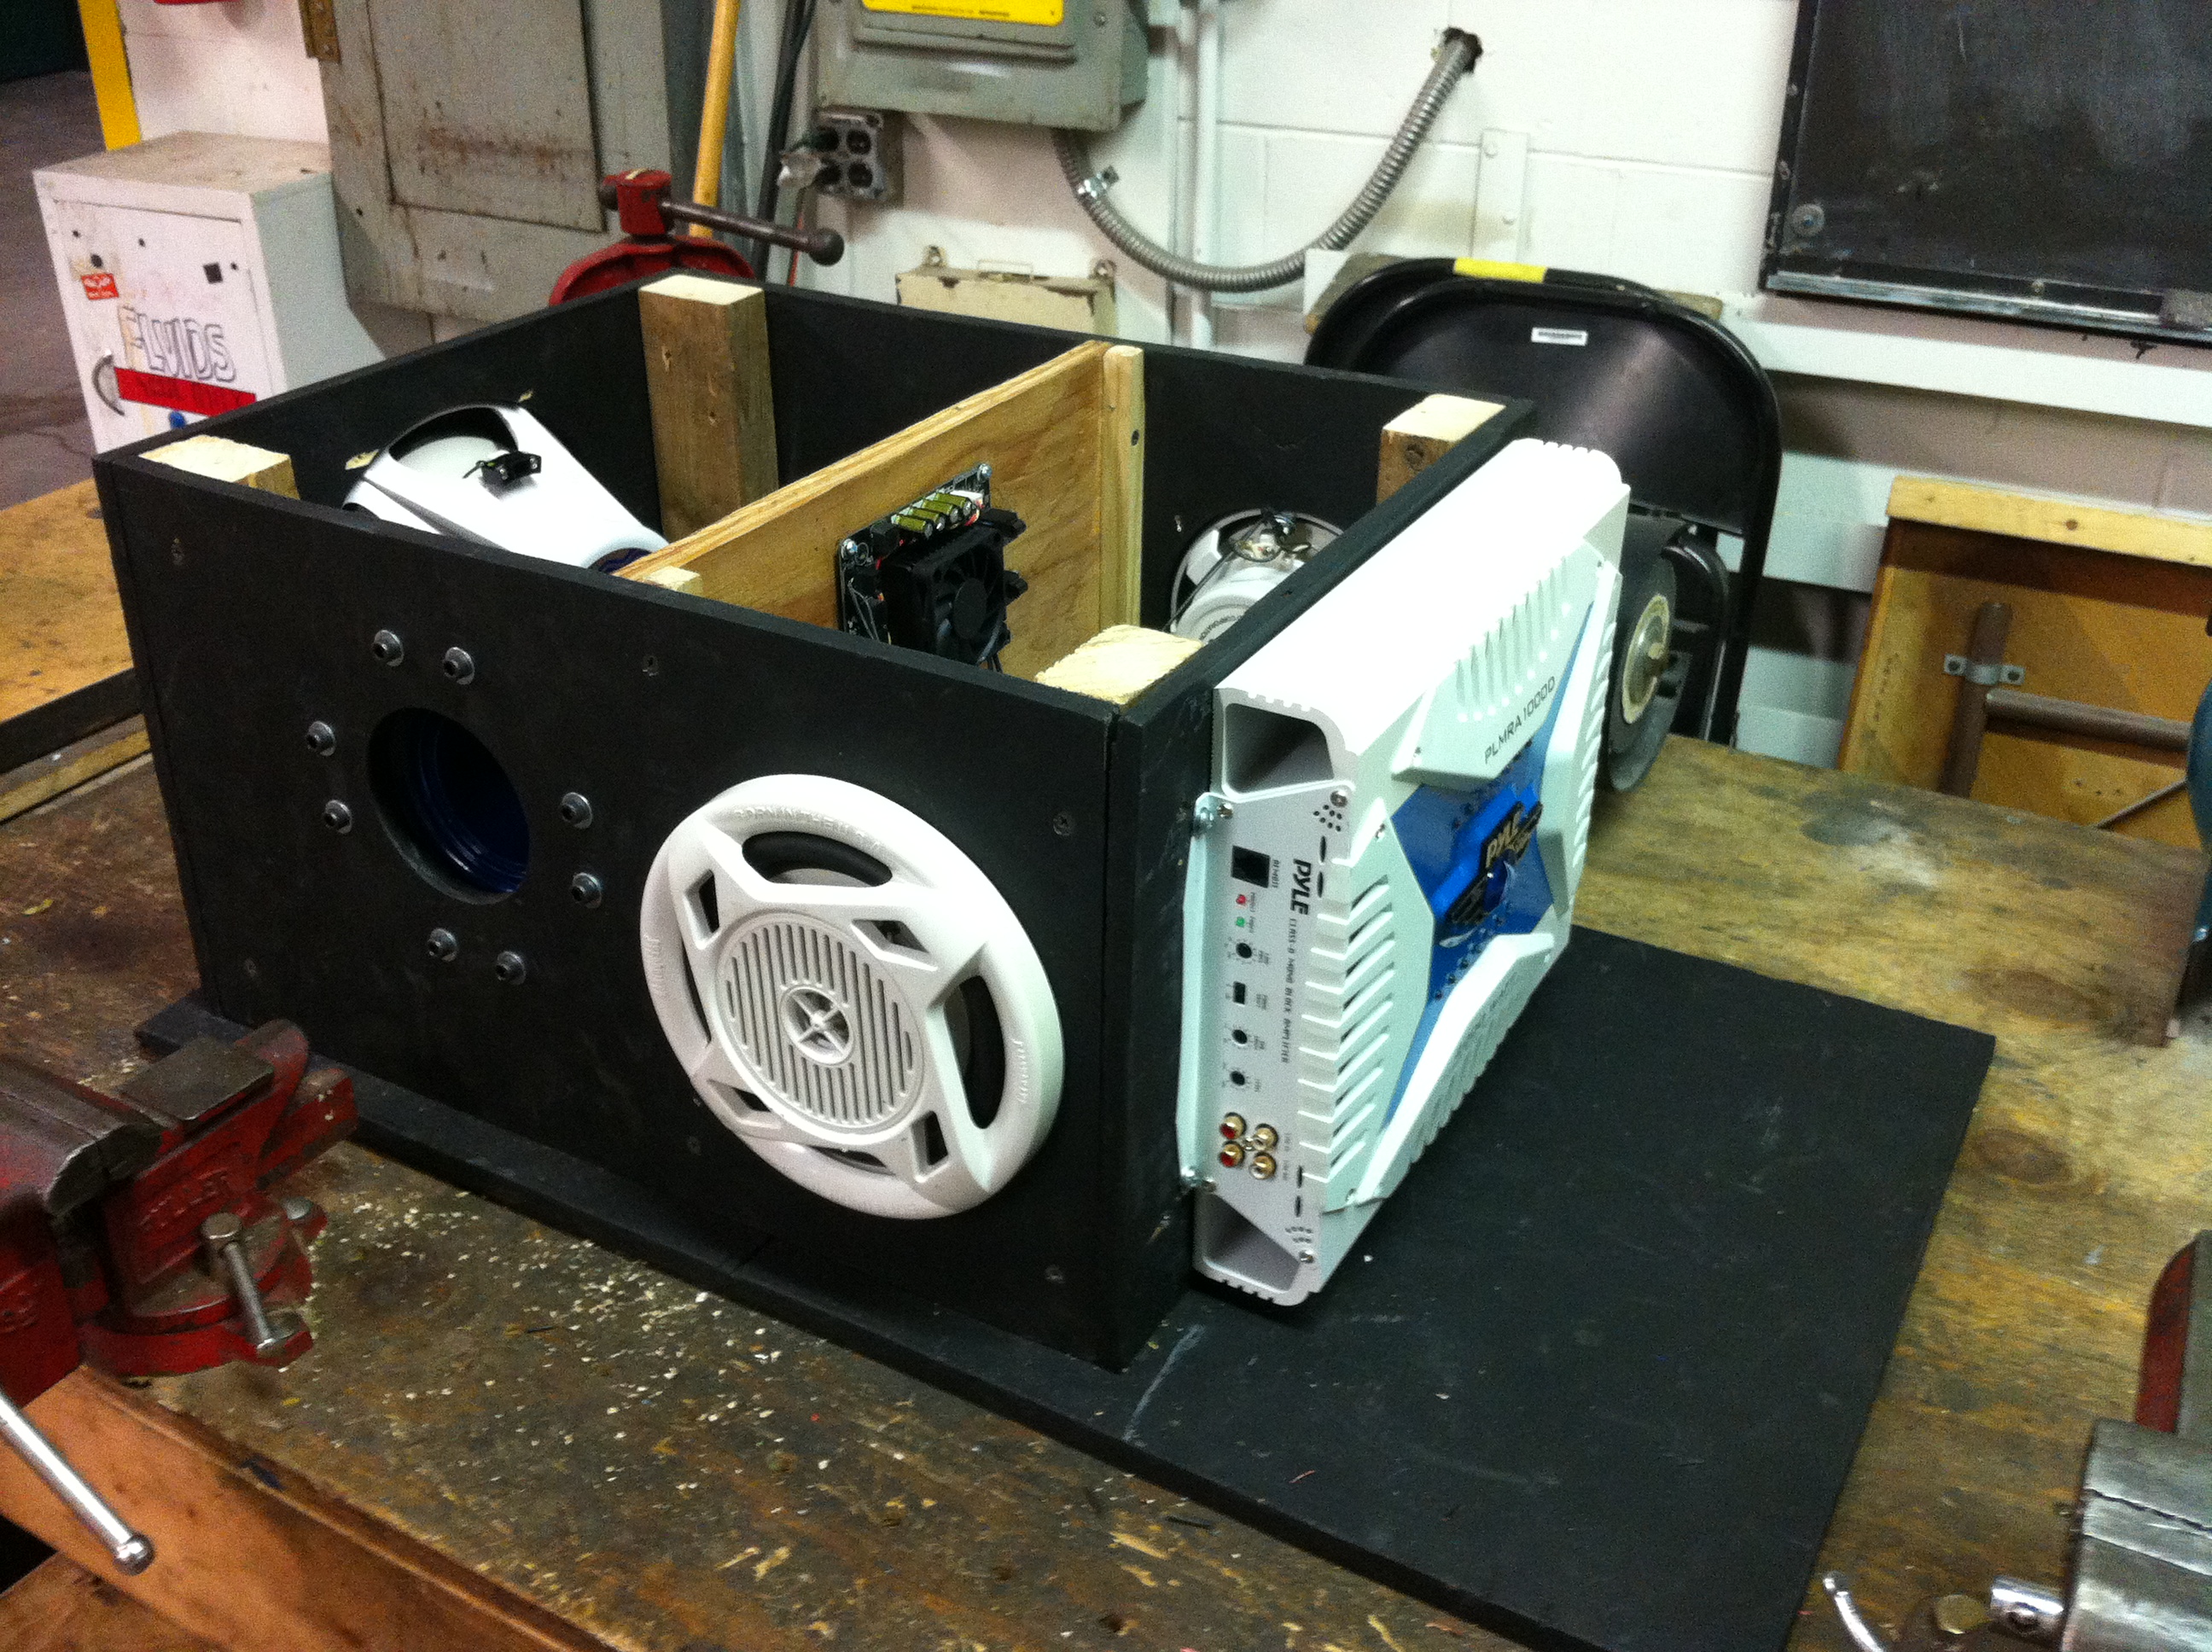
Once that was done, the next step was to build a simple base out of plywood. An internal divider was installed to separate the subwoofer enclosure from the midrange speaker enclosure:

04- box platform internal bracing

The subwoofer enclosure is sized for a reasonably flat bass frequency profile. Math!

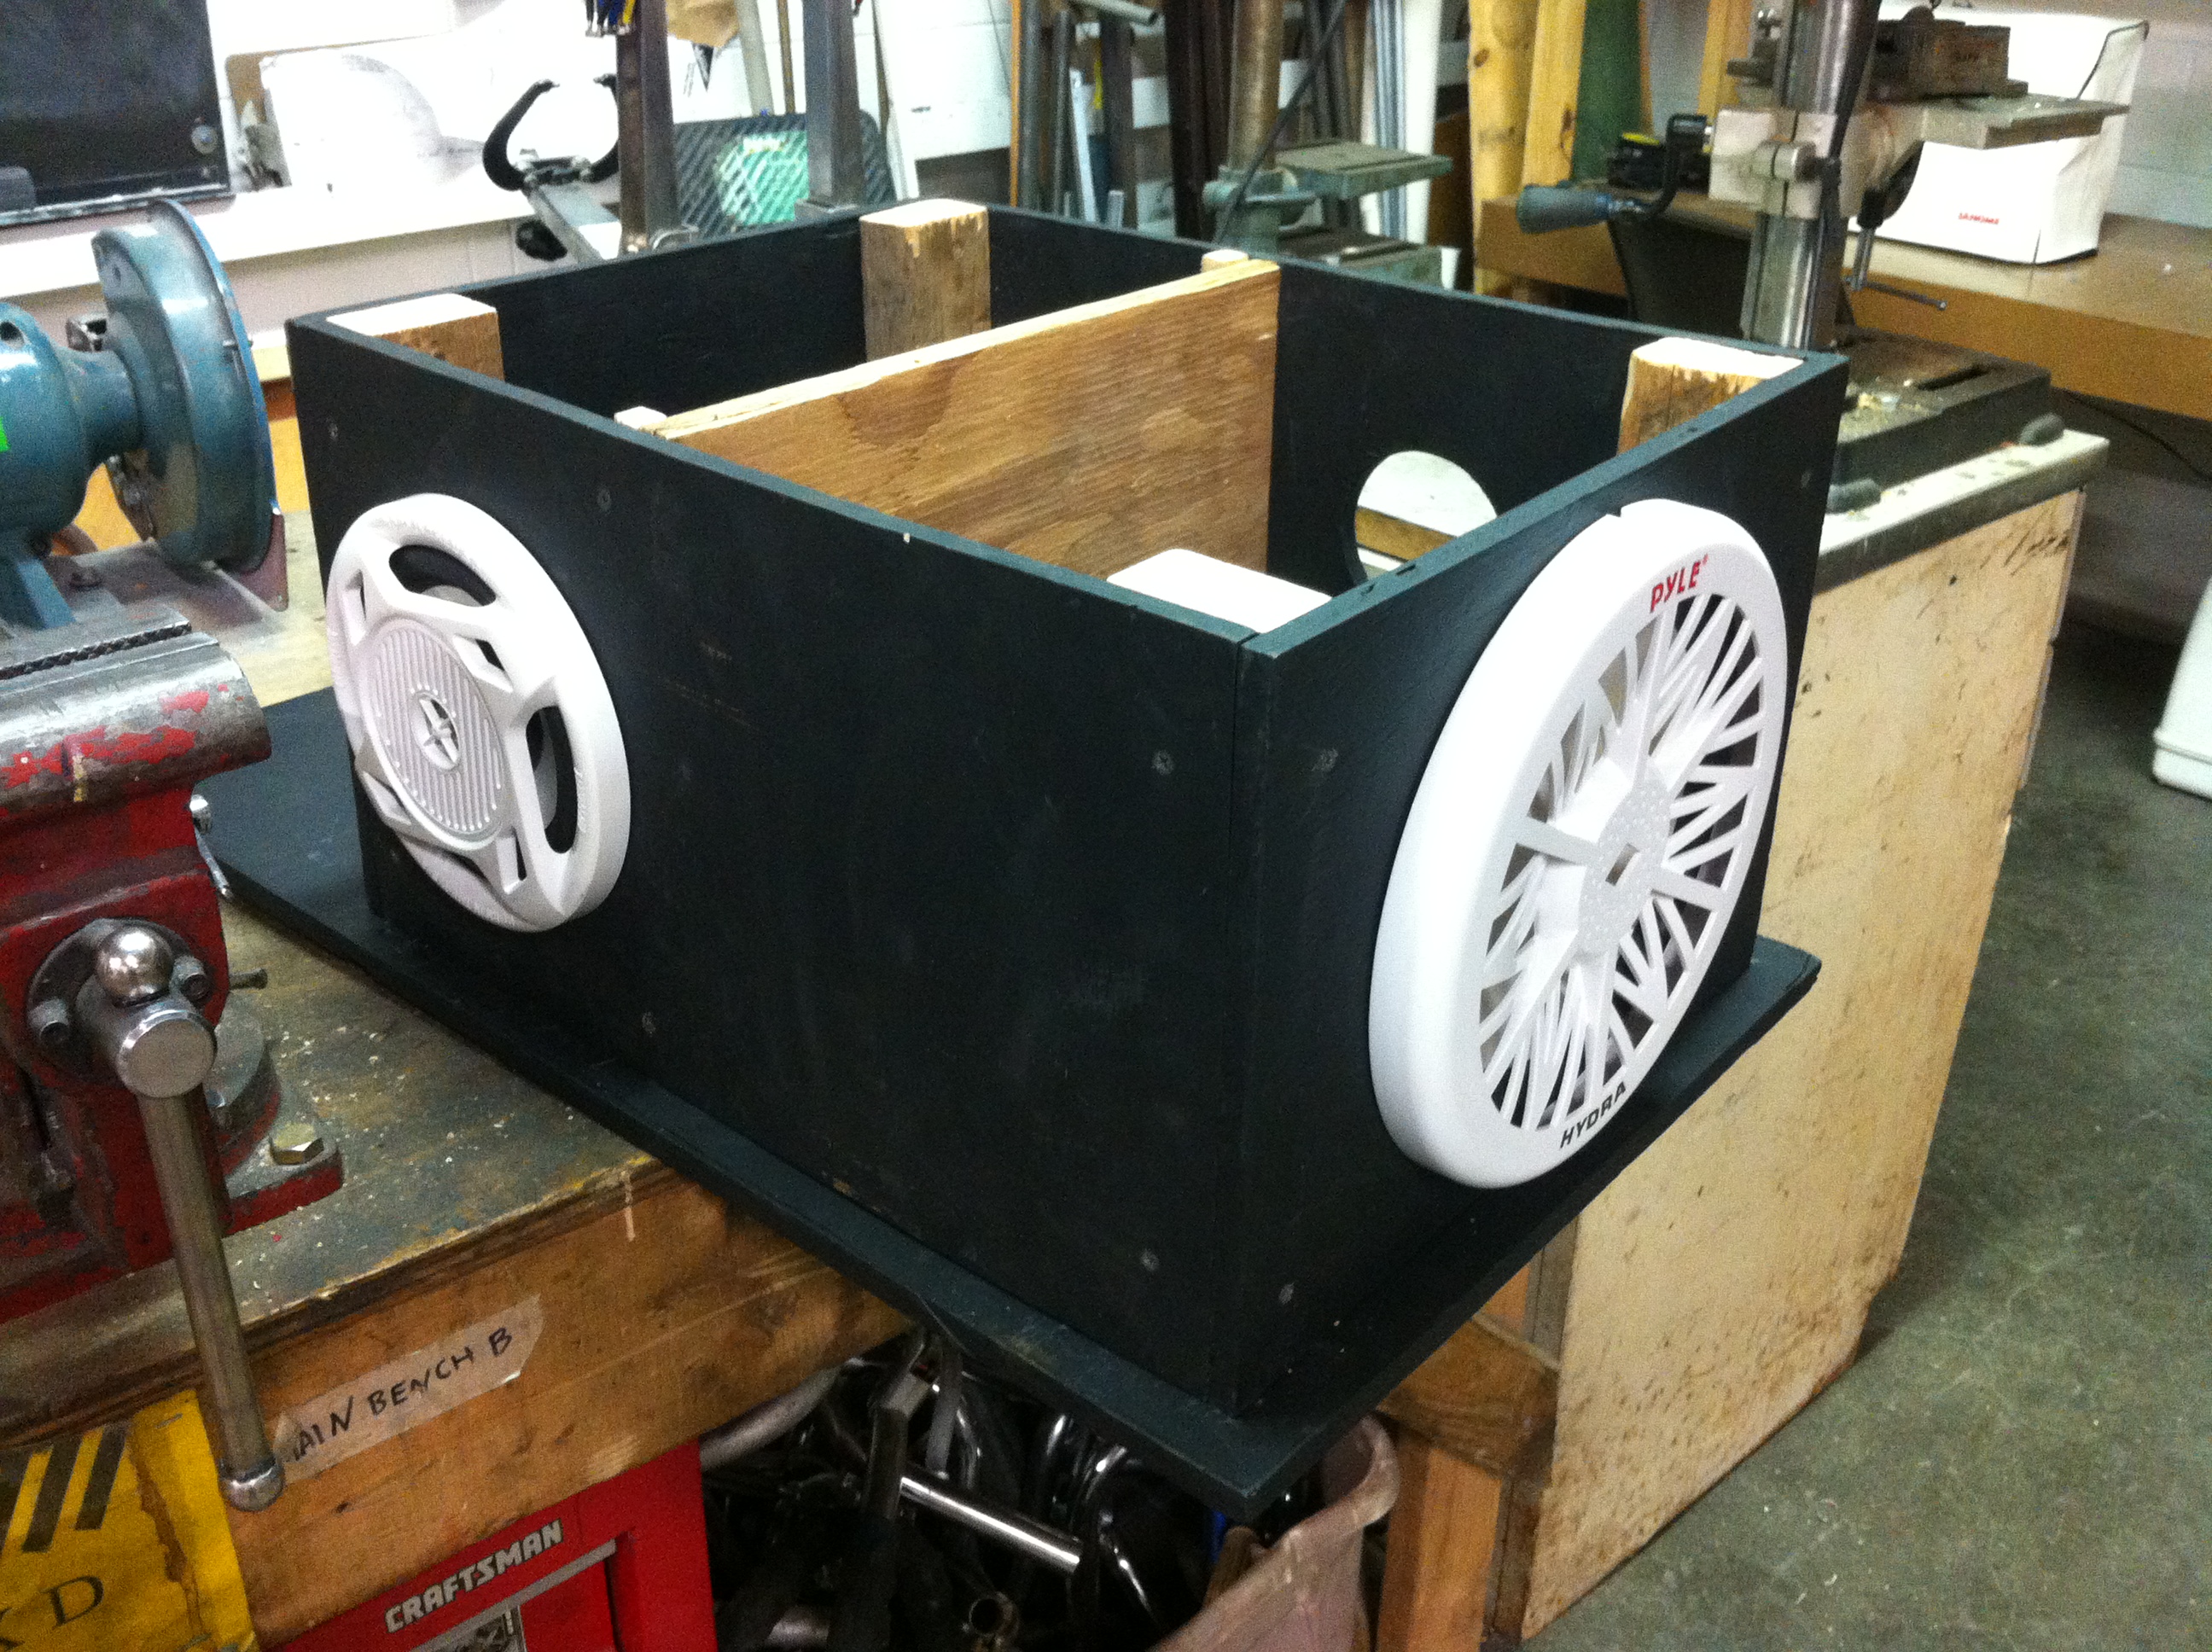
The midrange speakers installed easily enough:

05 - side speakers

The subwoofer was straightforward to mount as well:

06 - subwoofer mounted

I used a closet flange and a short length of PVC, painted blue, to make a port. The port will give this subwoofer enclosure a louder bass sound in this relatively small enclosure:

07 - port installed

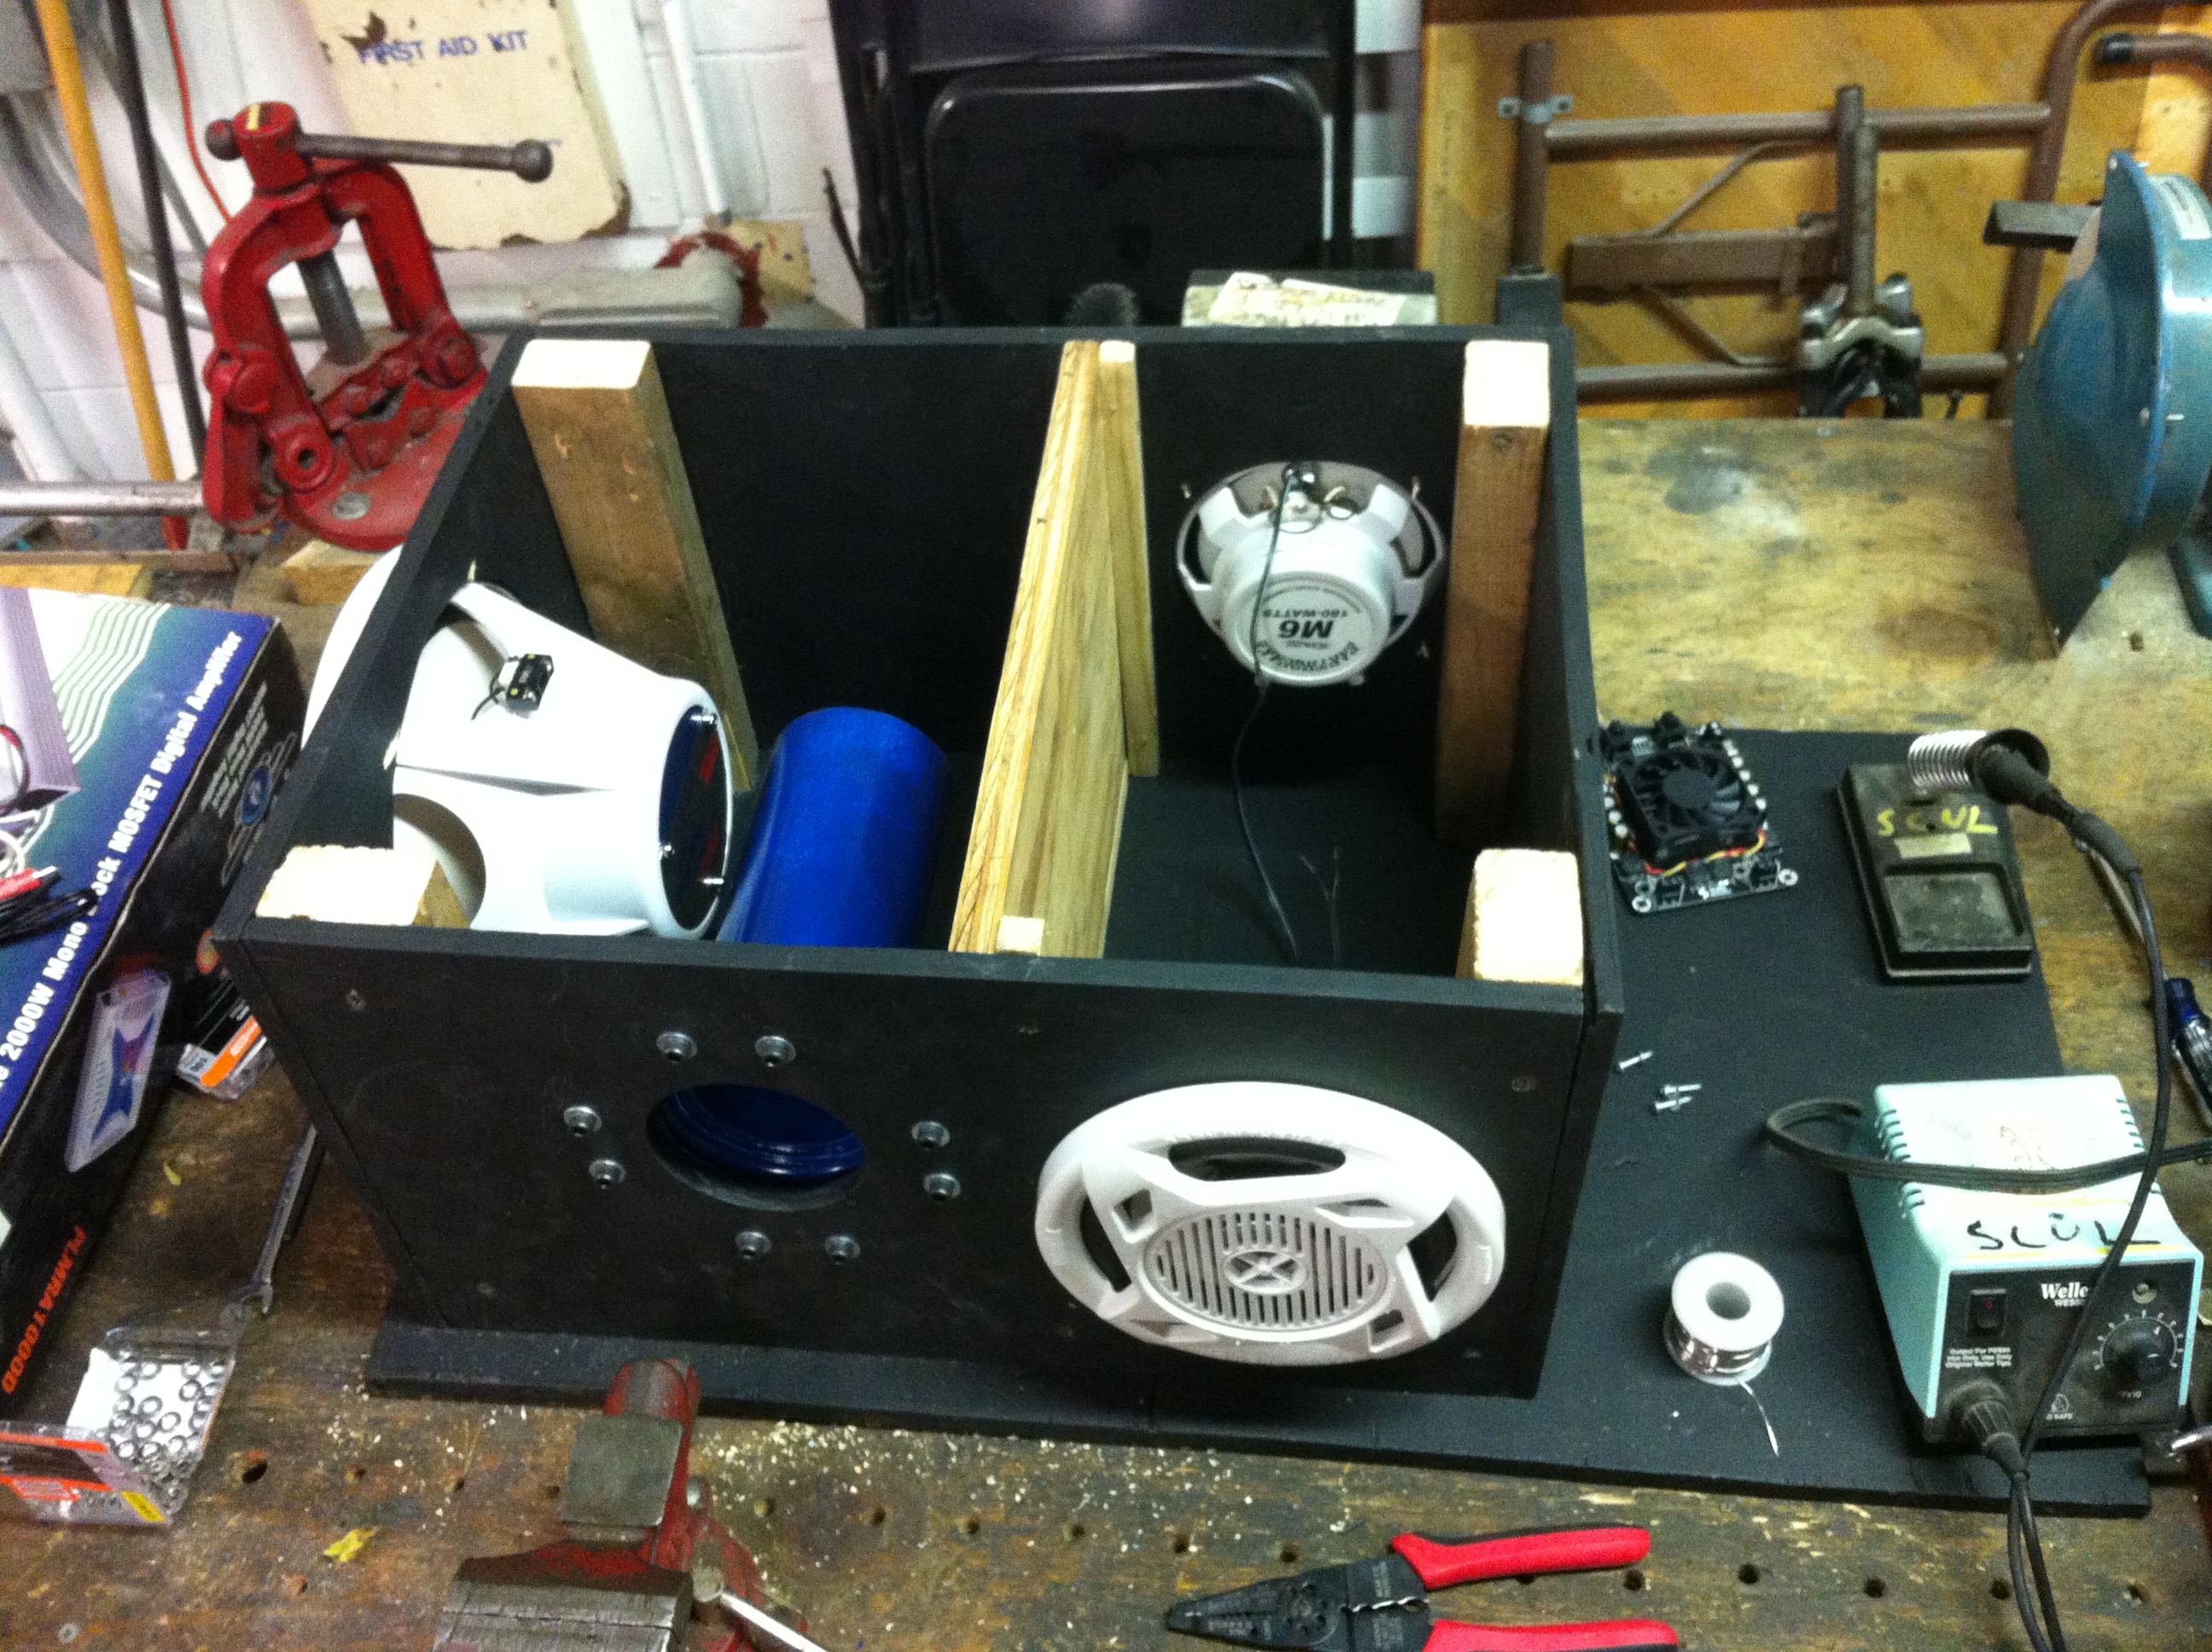
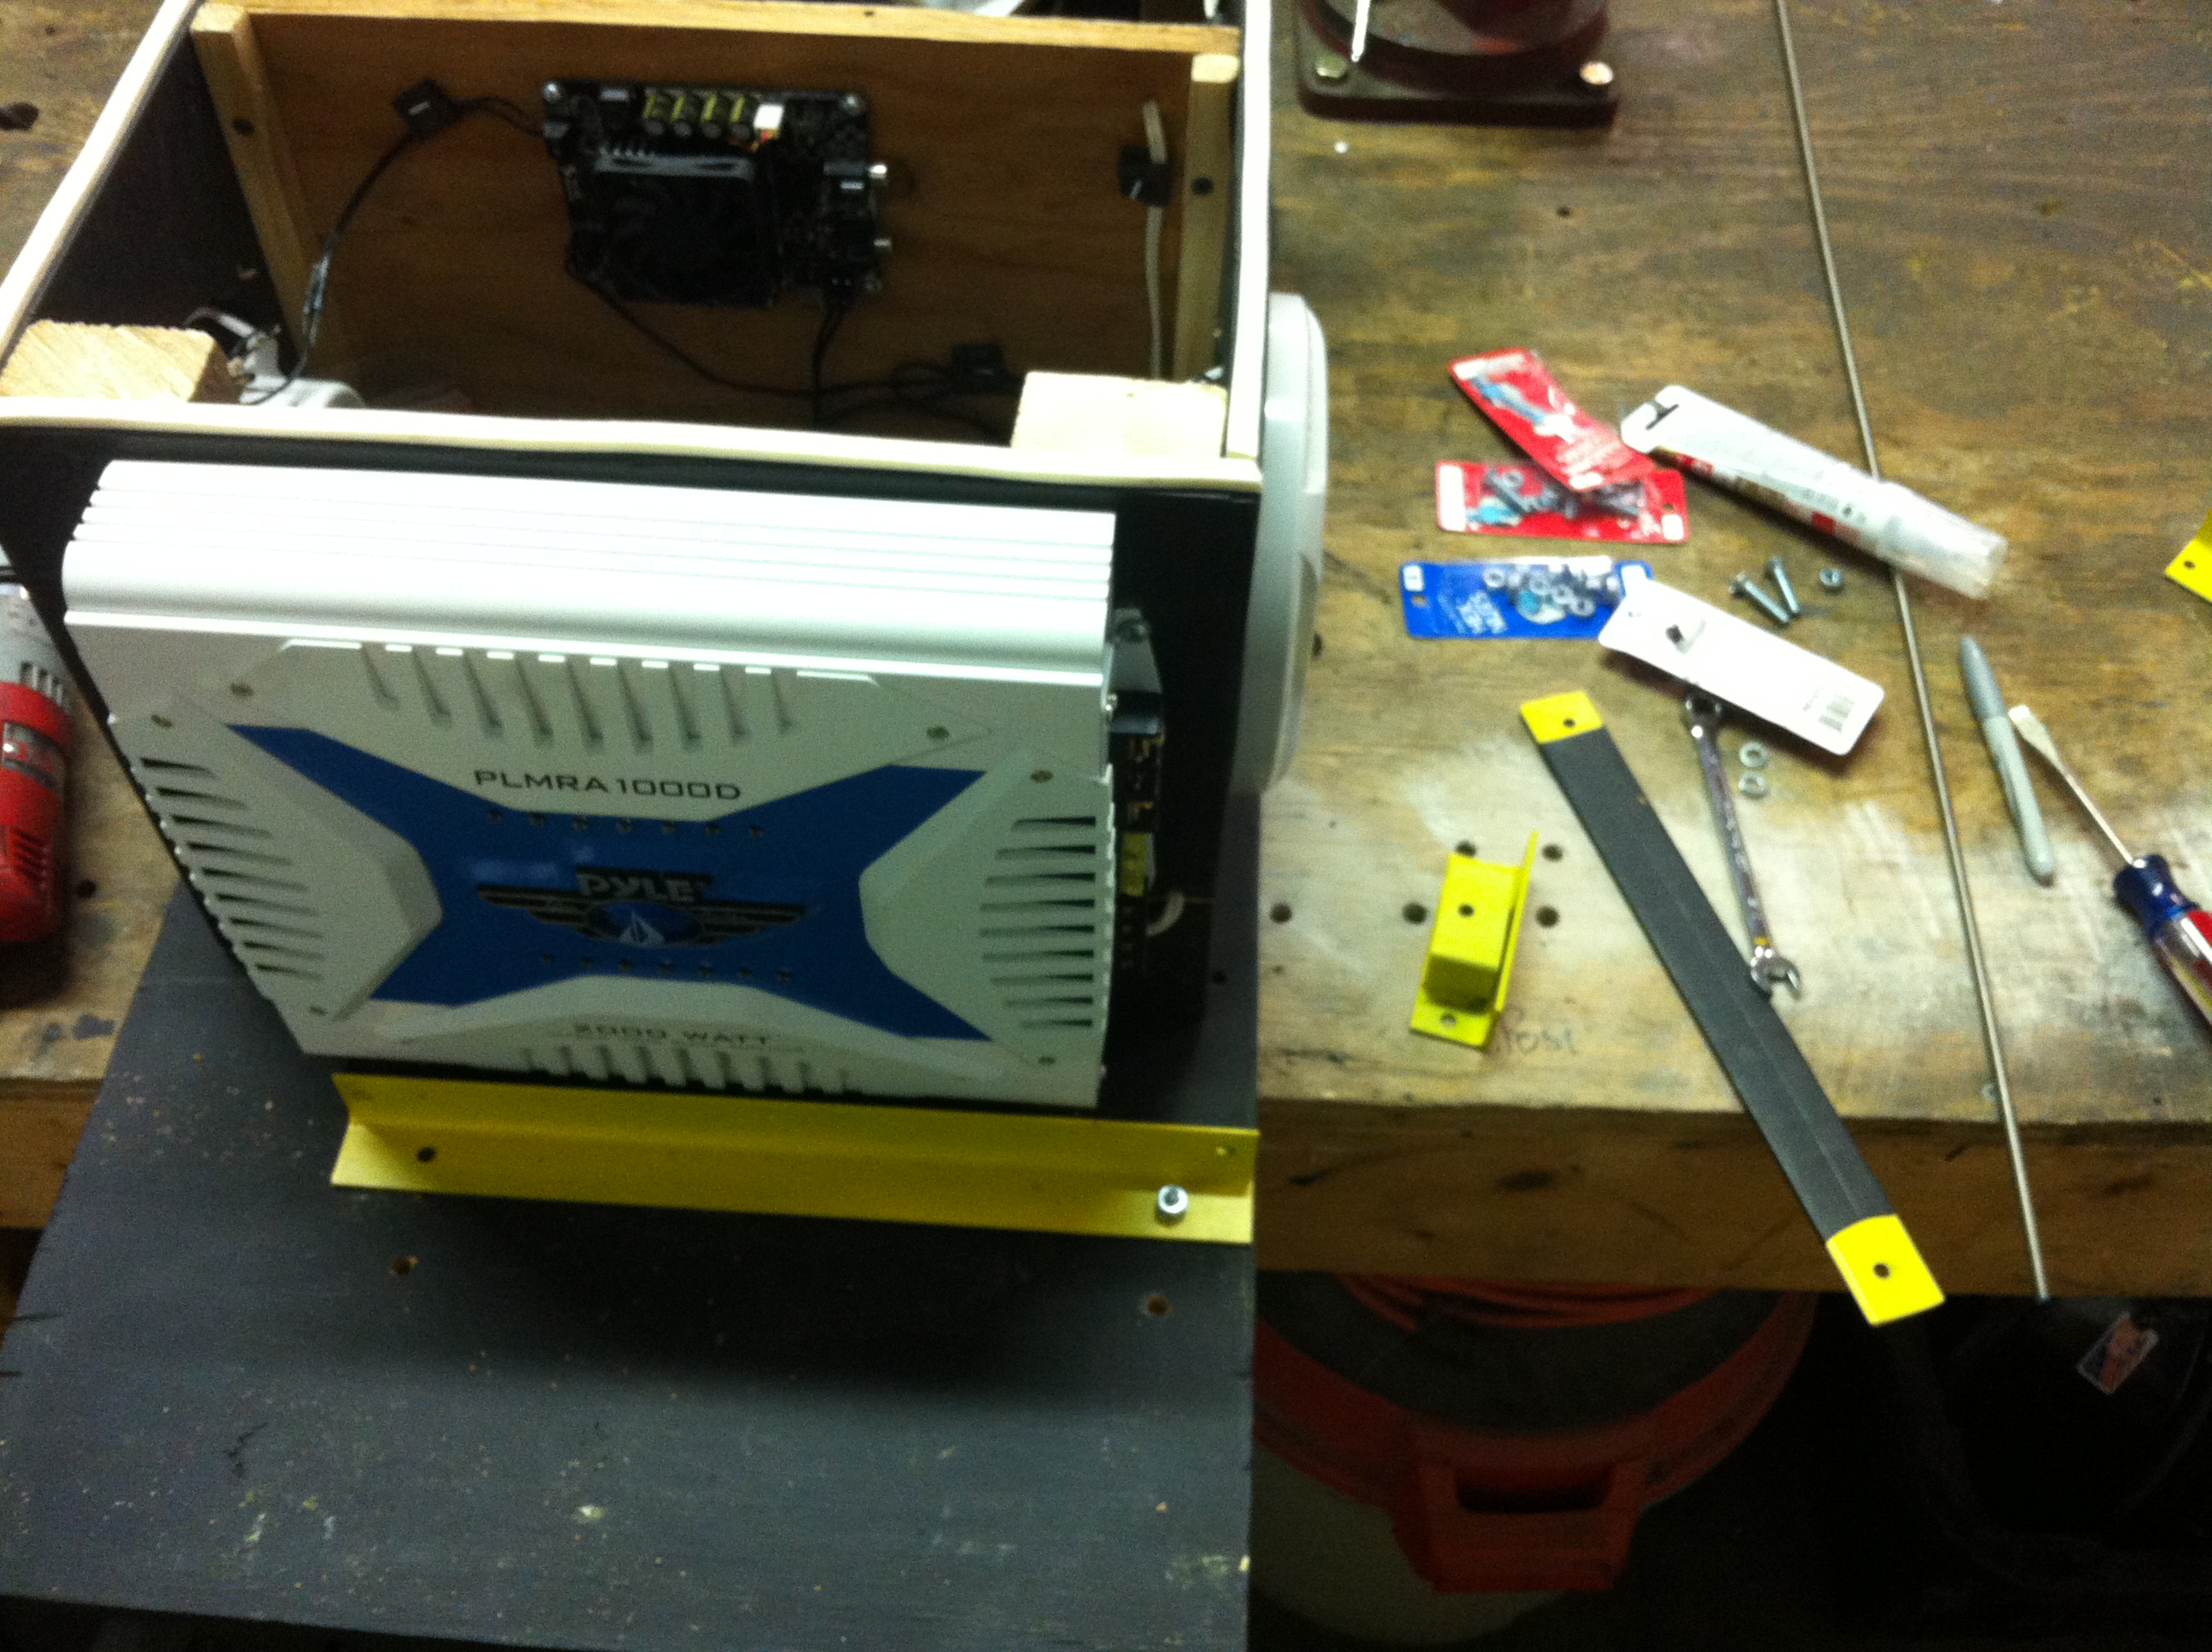
There are two amplifiers in this system. One is a T-class stereo amplifier for the midrange speakers. That’s installed on the inside of the box to keep it away from weather — this drop-in stereo system is designed to work even in rain. The speakers and the second D-class monoblock subwoofer amplifier are all marine grade equipment. Here are both amps installed:

08 - sub amp

The final step was to devise a mounting system for the marine battery. This was easily the most time consuming aspect of this project. I used steel bedframe (sandblasted and painted yellow), flat steel bar, inner tubes, threaded rod and some fasteners:

09 - battery mounting

The inside of the subwoofer enclosure section was packed with polyfill (pillow stuffing), which keeps the size of the enclosure small without compromising the bass frequency response. A simple electrical/audio bus box was added to tie all the electrical components together. Here’s the completed trailer mountable stereo system:

10 - completed radiobox trailer

After the inaugural ride — where it performed admirably — I ended up adding a roll cage around the electrical box to protect it from damage, as well as a tall safety flag for improved visibility.

Sparkle Pony

The most recent odd bicycle that I built is Sparkle Pony. The base was an old Schwinn BMX frame that had been discarded and was found leaning on a dumpster at an MIT loading dock. I extended the front fork to make it more chopper-like, which gives it a bit more style and groove when riding:

sparkle_pony

But the real innovation was this improvement to the rear caliper brakes:

Heck yeah! It shoots sparks when the rear brake lever is engaged. There’s a coaster hub on the rear wheel, so the caliper braking system isn’t necessary, it’s just redundant.

So, how? The core component is a rod of mischmetal, also known as firesteel. It’s a blend of metals that sparks easily when struck by a hard object.

First I sanded and scored the sidewall on the rear rim to remove the paint and rough it up. Then I coated the sidewalls in superglue, and shook coarse sandblaster media onto them, making an abrasive rim. When I spun the wheel and pressed the mischmetal rod to the abrasive rim, it shot sparks. Great!

Then, I cut two small pieces of mischmetal rod with a hacksaw. It cuts just like regular metal, only with lots of sparks. This also has the side effect of leaving some metal bits caught in the hacksaw blade, which causes some slight sparking the next few times the hacksaw is used.

I drilled a small hole in one end of each piece of cut rod and threaded the hole with a tap. This allowed me to attached the mischmetal rod to the slot that normally holds the brake pads. I carefully adjusted the “brakes”, orienting the mischmetal so that it strikes the center of the sidewall on the rim when the brakes are compressed, and this was done!

Roll Bounce

So in the past year I’ve built two more freak bikes.

The first one, which I’m calling Roll Bounce, looks like a normal bike at first glance:

roll_bounce

It started as a trashed full-suspension Pacific frame and fork. I stripped off the useless parts (most of it), cleaned off all the stickers with naptha and greased up all the bearing surfaces that were salvageable. What goes well with suspension? More suspension! Asking around, digging through spare parts bins and some generous donations landed me a suspension seatpost:

suspension_seatpost

a suspension stem:

suspension_stem

and even suspension handlebars. That’s a vibraslap being used as the bell:

vibraslap

The result is a very floppy and suspended ride, which helps a lot because:

The hubs are not in the center of the wheels! They are offset by one centimeter. The reason why isn’t the point — the point is — how?

Loads of thanks to Gideon Weisz for the innovation that made this possible. Gideon is a jeweler and, among other things, makes rings. He was creating ring modeling software when I mentioned my off-center wheel project, and Gideon offered to modify his ring modeling software for spoke calculations. When building wheels, it’s important to know how long the spokes should be — too short, and they won’t reach the rim; too long and they’ll poke into and puncture the inner tube. However, all other spoke calculators assume that the hub will be in the center of the wheel. Gideon’s spoke calculator can apply an offset to the hub and calculate individual spoke lengths! Wicked cool.

With the spoke lengths in hand, I collected 72 spokes of varying lengths over the course of a few weeks. Not all spoke lengths are readily available, so this involved scrounging some from parts bins, extending the threads and trimming spokes when I found close matches, and hunting for others from local bike shops. I also had a few spokes custom cut at Paramount Bicycle; thanks Tyler.

Then I built the wheels, lacing them with a standard three-cross pattern. They came together surprisingly quickly and the spoke lengths worked out perfectly.

Riding this bicycle is like riding on a slowly undulating, rippling surface. It is pretty comfortable but the constant bobbing can get disorienting after a while, and it’s a pretty rough ride when bombing down hills. I took meclizine for motion sickness the first time I rode it for a few hours but have ridden it a few times since without chemical assistance and had no problems. Huzzah!

I’ll blog about the next build in another post.

Next Page »