Trailer build
I know it’s been a while since I’ve posted, but that doesn’t mean I’ve been idle! Far from it — I’ve been enjoying making things so much that I haven’t had an opportunity to sit down and write about them. Here’s a project I worked on late last summer — a bicycle trailer.
Believe it or not I own a car, which rarely sees use. Before this project was completed, I used my car to haul heavy objects and for traveling out of the city. The inspiration to build this came while I was stuck in motor vehicle traffic one summer morning. I was heading to Home Depot, which is about 3 miles from where I live, and it took me over an hour to get there since I accidentally took a wrong turn and ended up at the Sullivan Square rotary during rush hour. I was so frustrated at wasting so much time, slowly baking, uselessly burning gas and money that I vowed to build a bicycle trailer with enough cargo capacity and strength to carry cinder blocks. What resulted was a trailer with a 200 pound load capacity. Here’s how I built it.
This trailer is based on free plans, available online, from Pedal People, which is a bicycle delivery co-op out in Northampton. Mad props to those folks for posting detailed plans and instructions on their trailer design! I am indebted to them for posting their plans, and especially for demystifying the hitch. Using those plans as a guideline simplified the process greatly and prevented lots of mistakes!
The first step in building the trailer was sourcing materials. The plans recommended using galvanized steel for the frame since it’s inexpensive and readily available. However, it can be hazardous to weld since inhaling the zinc-heavy fumes causes a temporary illness called metal fume fever. While this can be avoided through good ventilation and wearing a gas mask, I opted not to risk potentially several days of illness and recovery in order to save a few bucks and used 4130 steel tubing instead. This tubing has excellent welding characteristics and does not produce toxic fumes when welded. This was my only major departure from the materials list in the plans, but it bumped the cost up to a total of around $80 instead of $50 for materials.
The next step was learning how to use a hydraulic tubing bender:
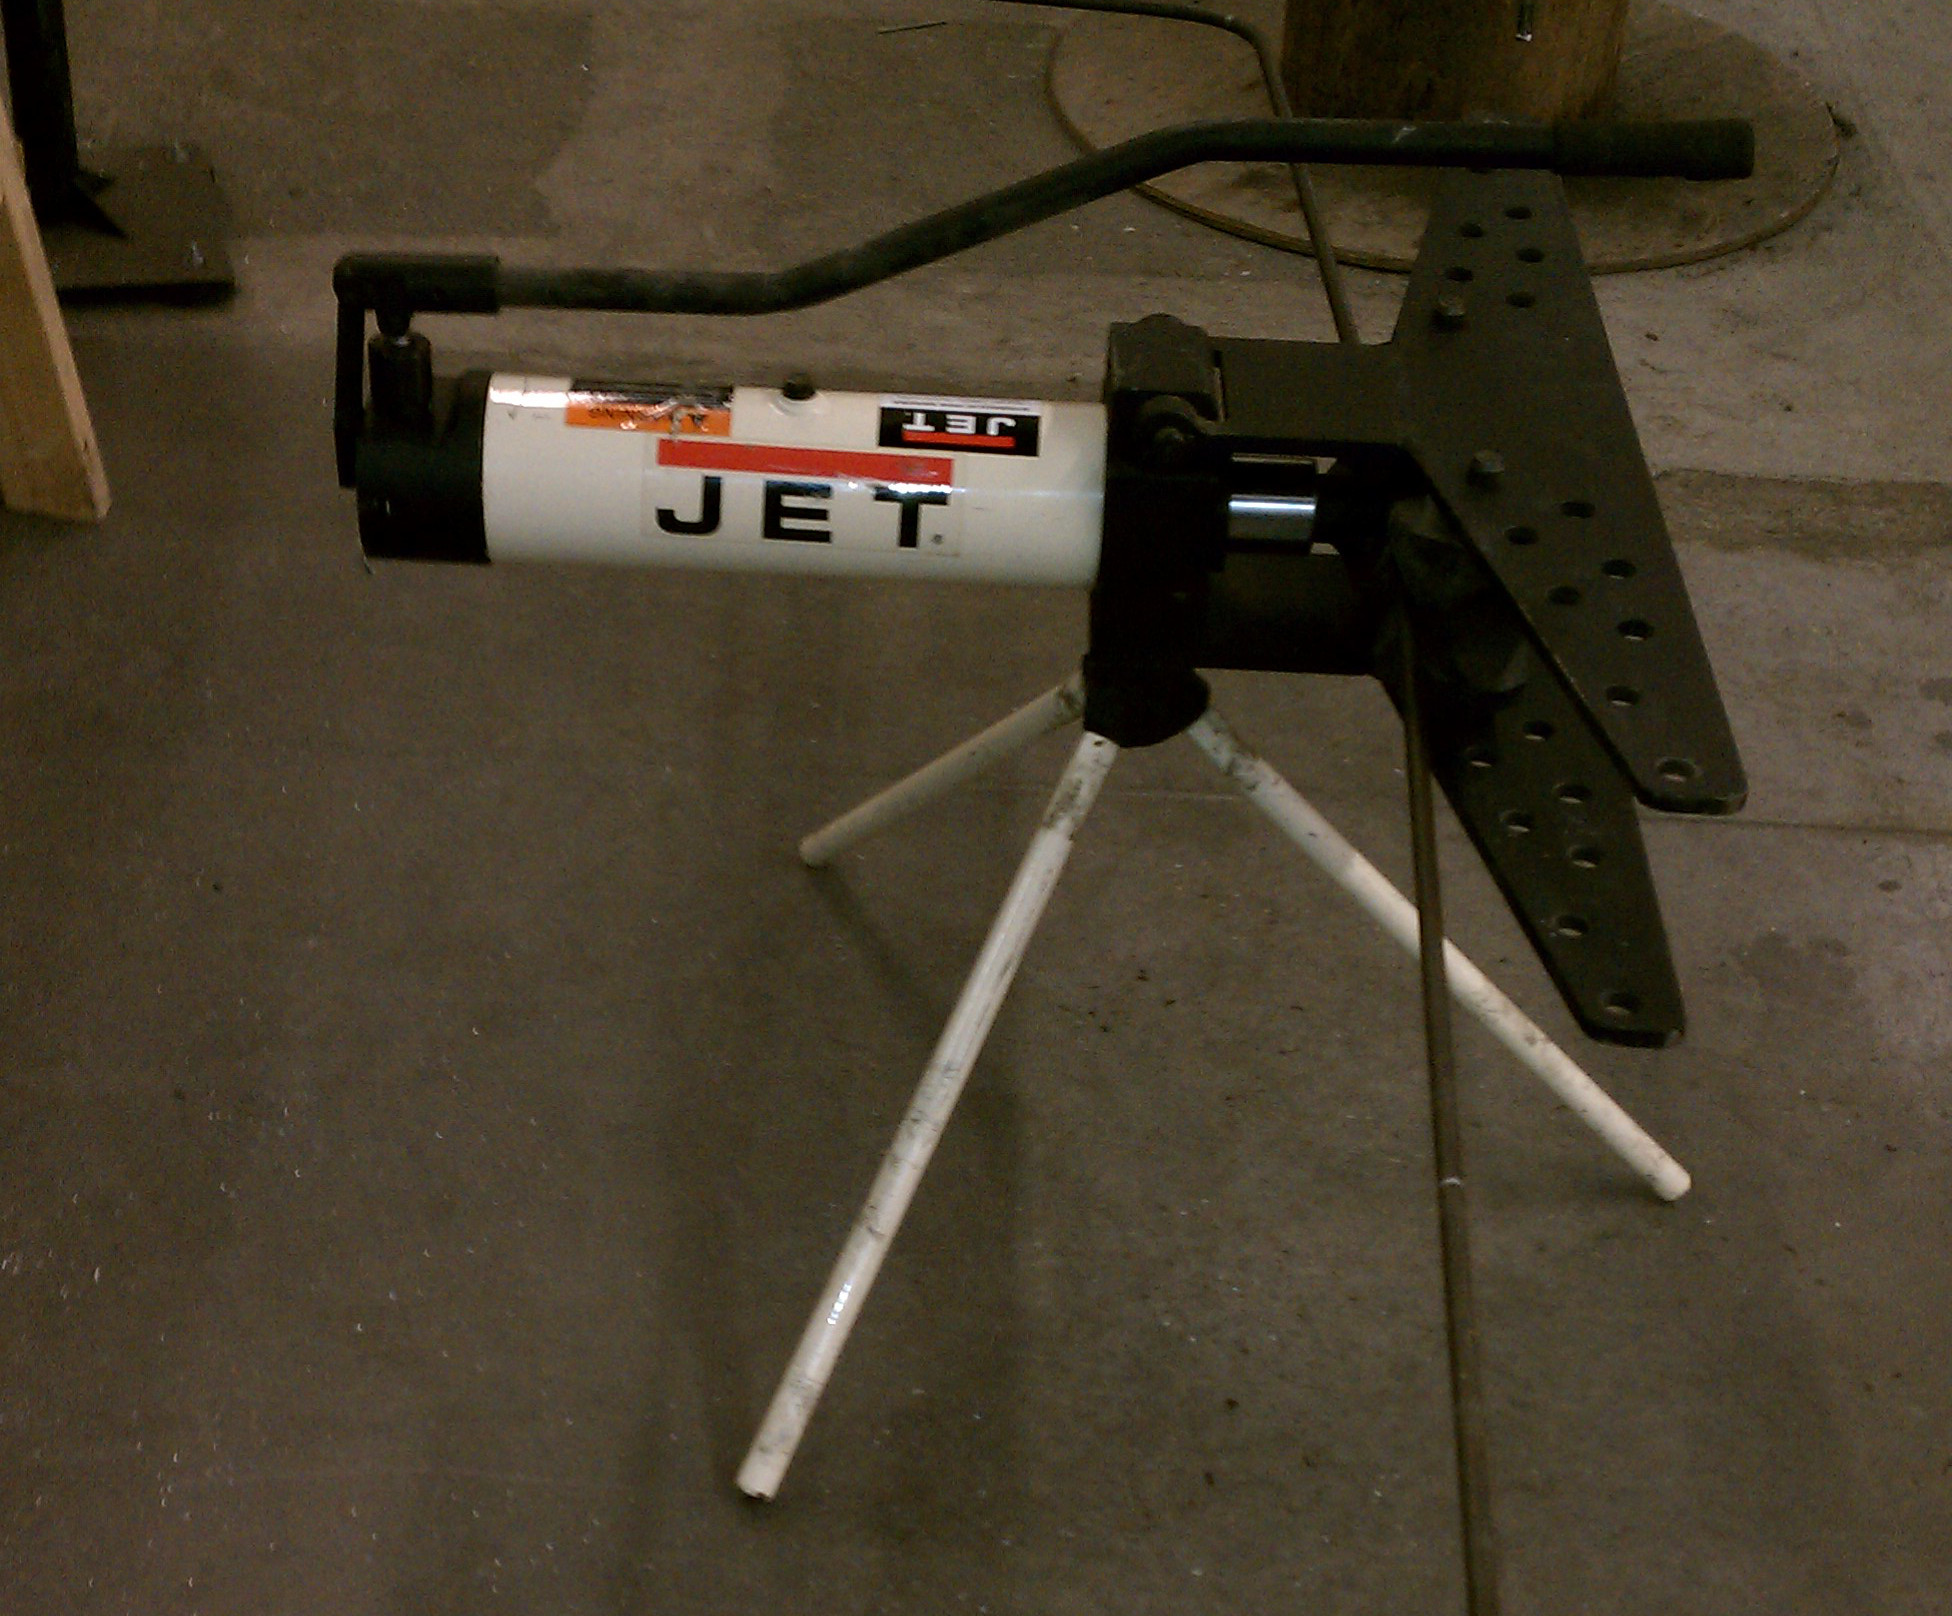
This non-intimidating-looking beast is incredibly powerful. It can generate up to 20 tons of force and can bend tubing up to 3″ in diameter. However, it can be dangerous when used improperly. Metal that is not aligned properly can slip out of the bending die and recoil, injuring the operator or bystanders. A leak in the hydraulic chamber can cause it to rupture and spray hydraulic fluid, which is poisonous if it enters the bloodstream — and the pressure from a leak can be high enough that the fluid injects itself. Yecch.
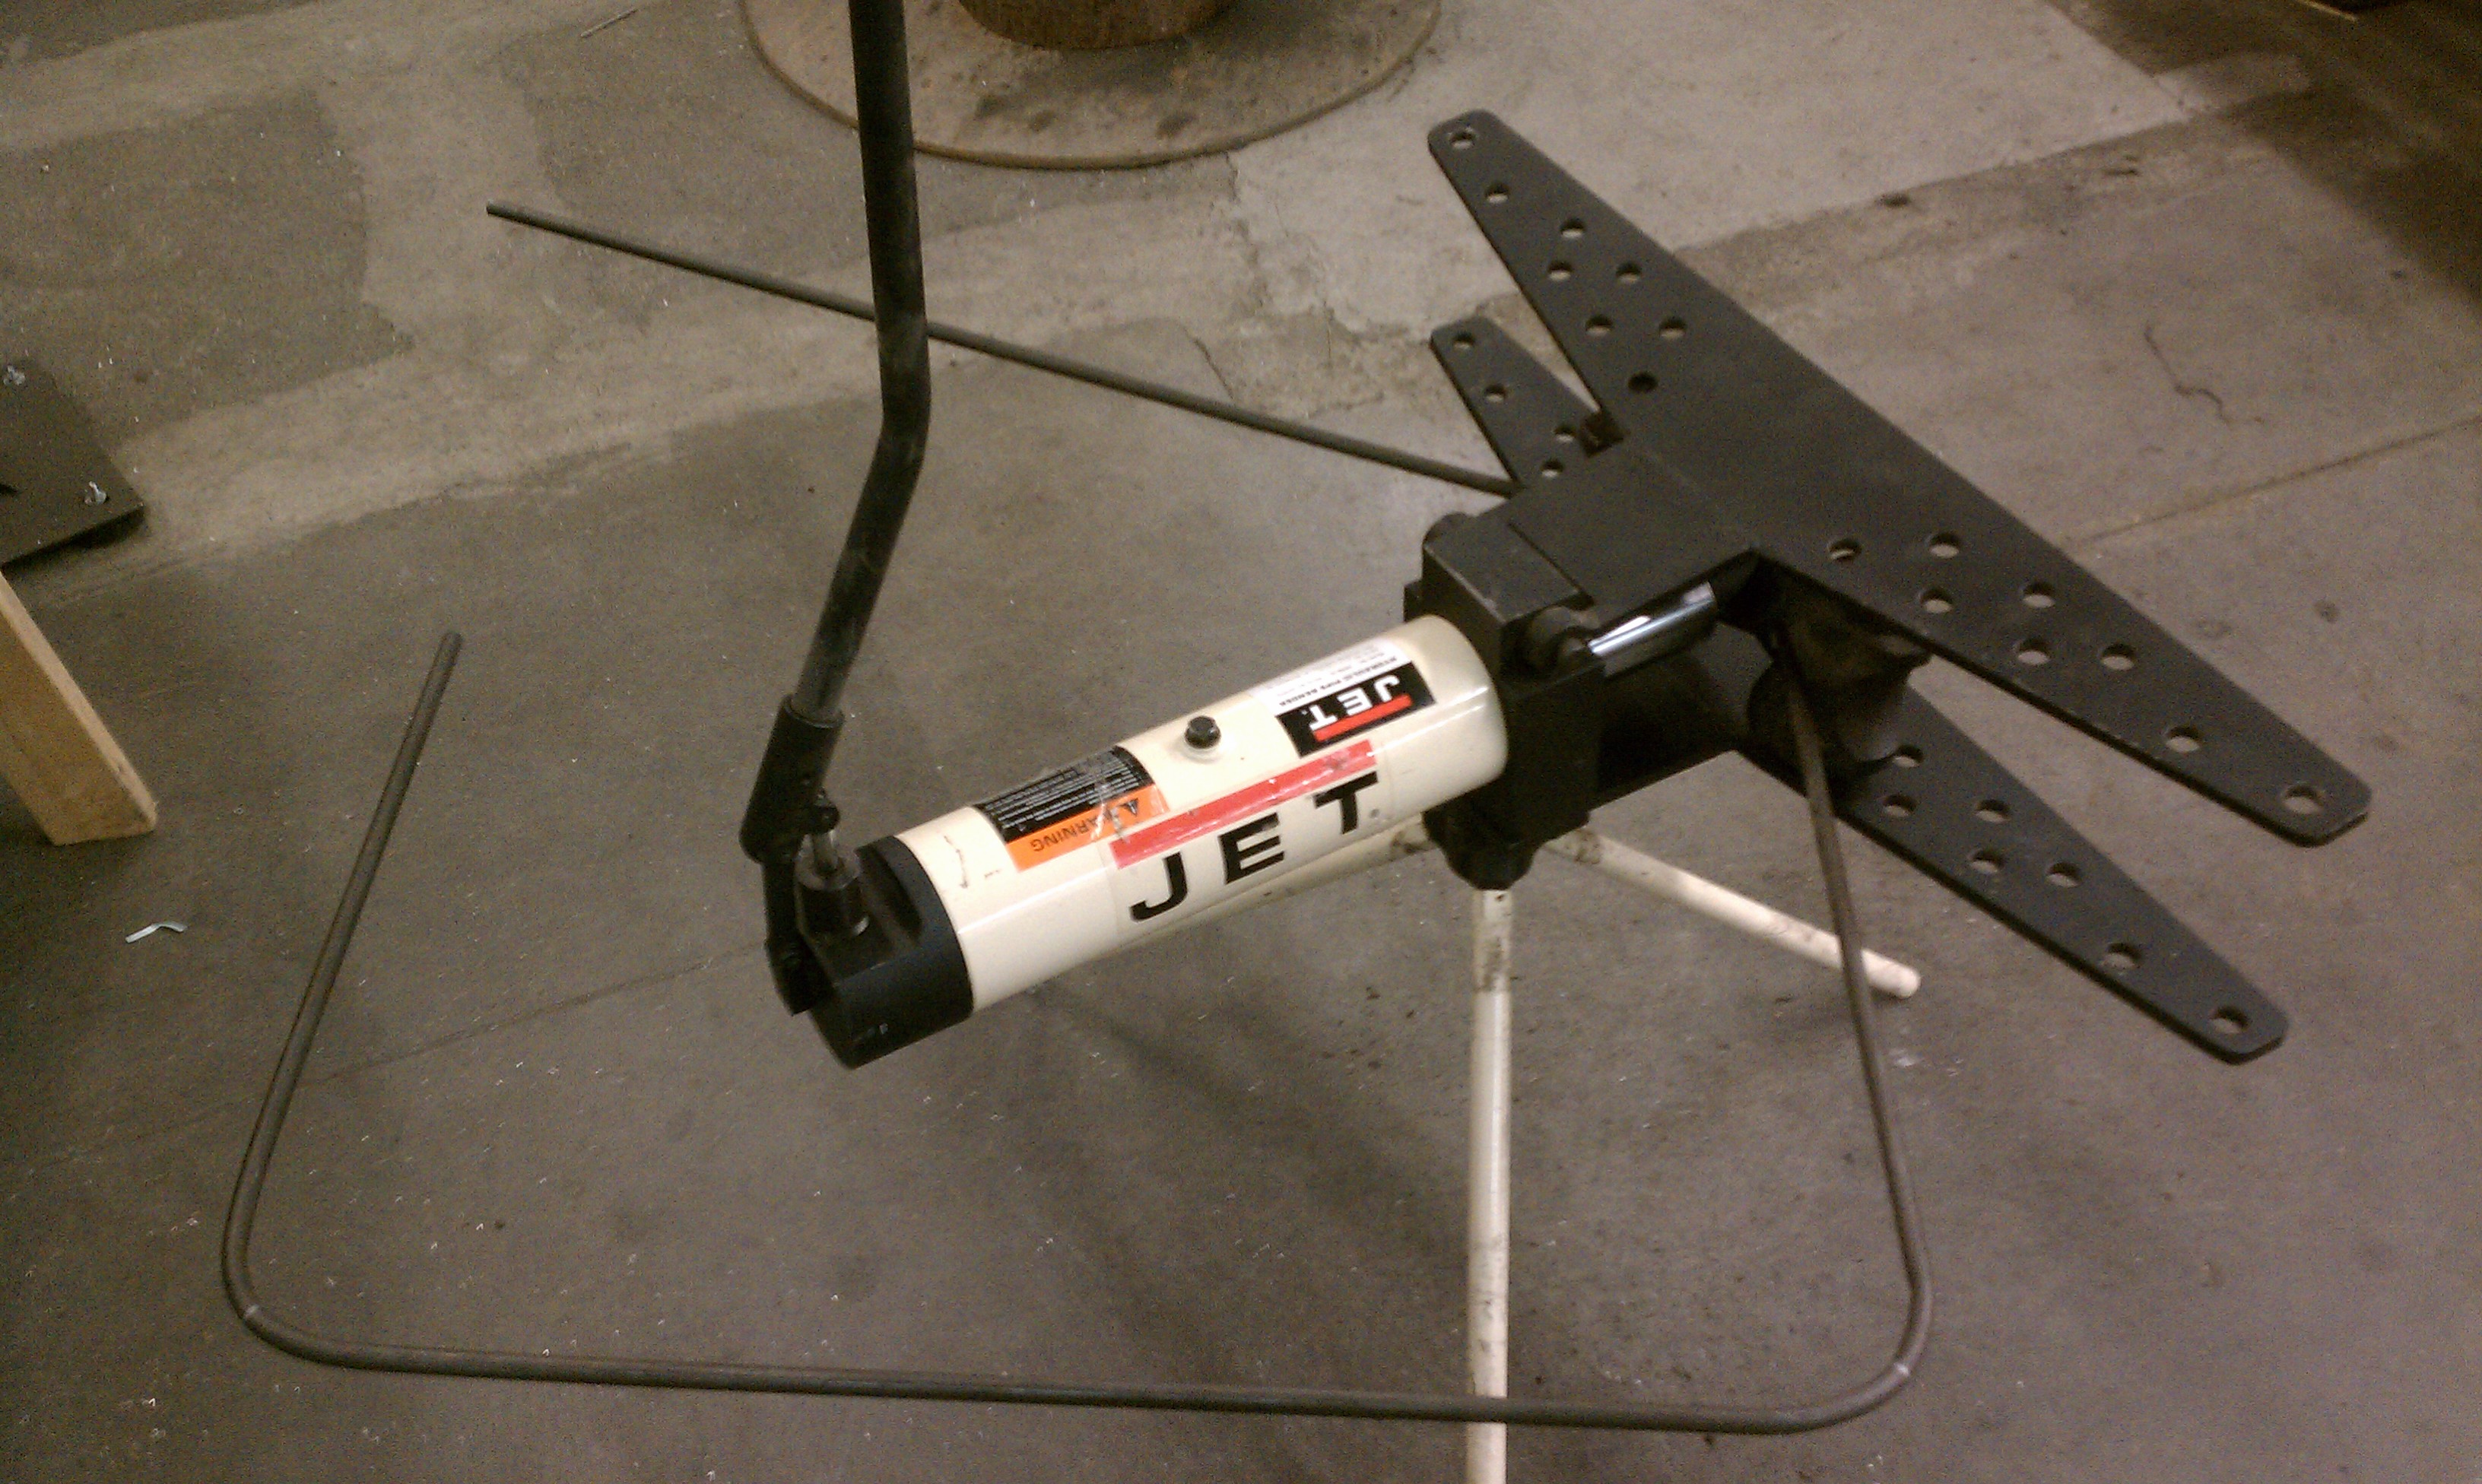
So, after reviewing the manual, asking for advice, topping off the fluid and checking that all the parts were in working order, I fitted up the main tubing that would form the body of the trailer and started bending:
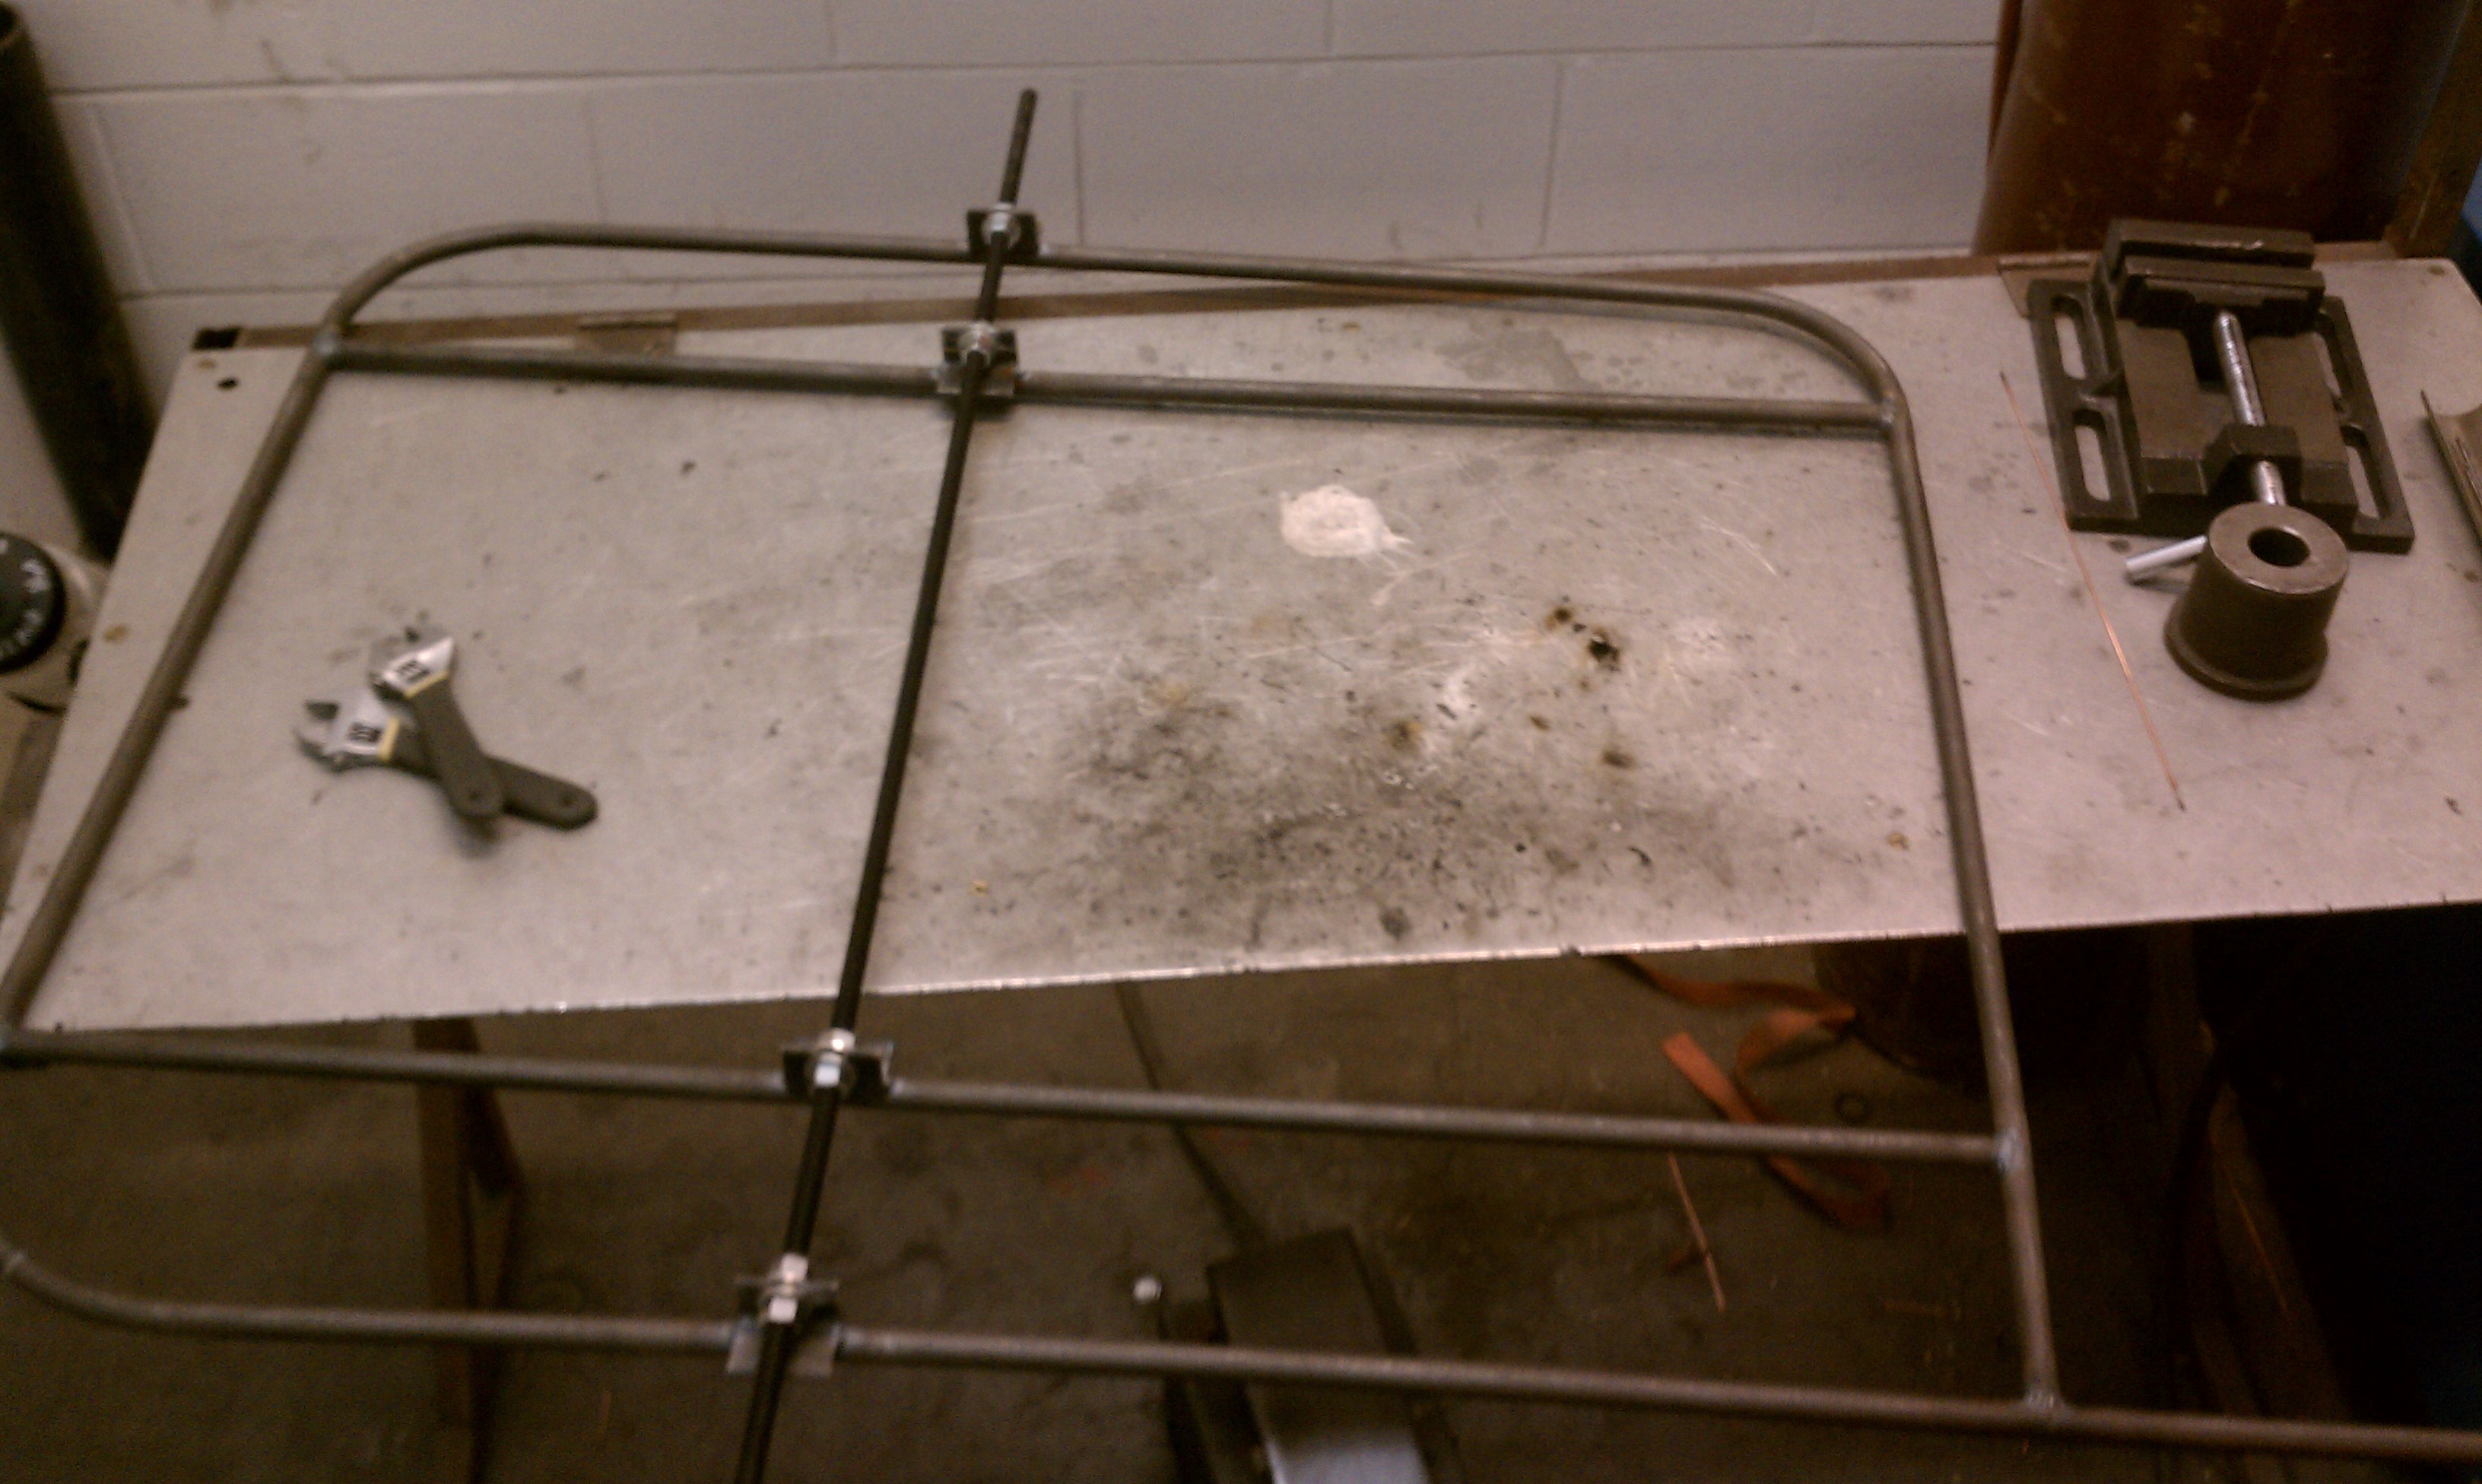
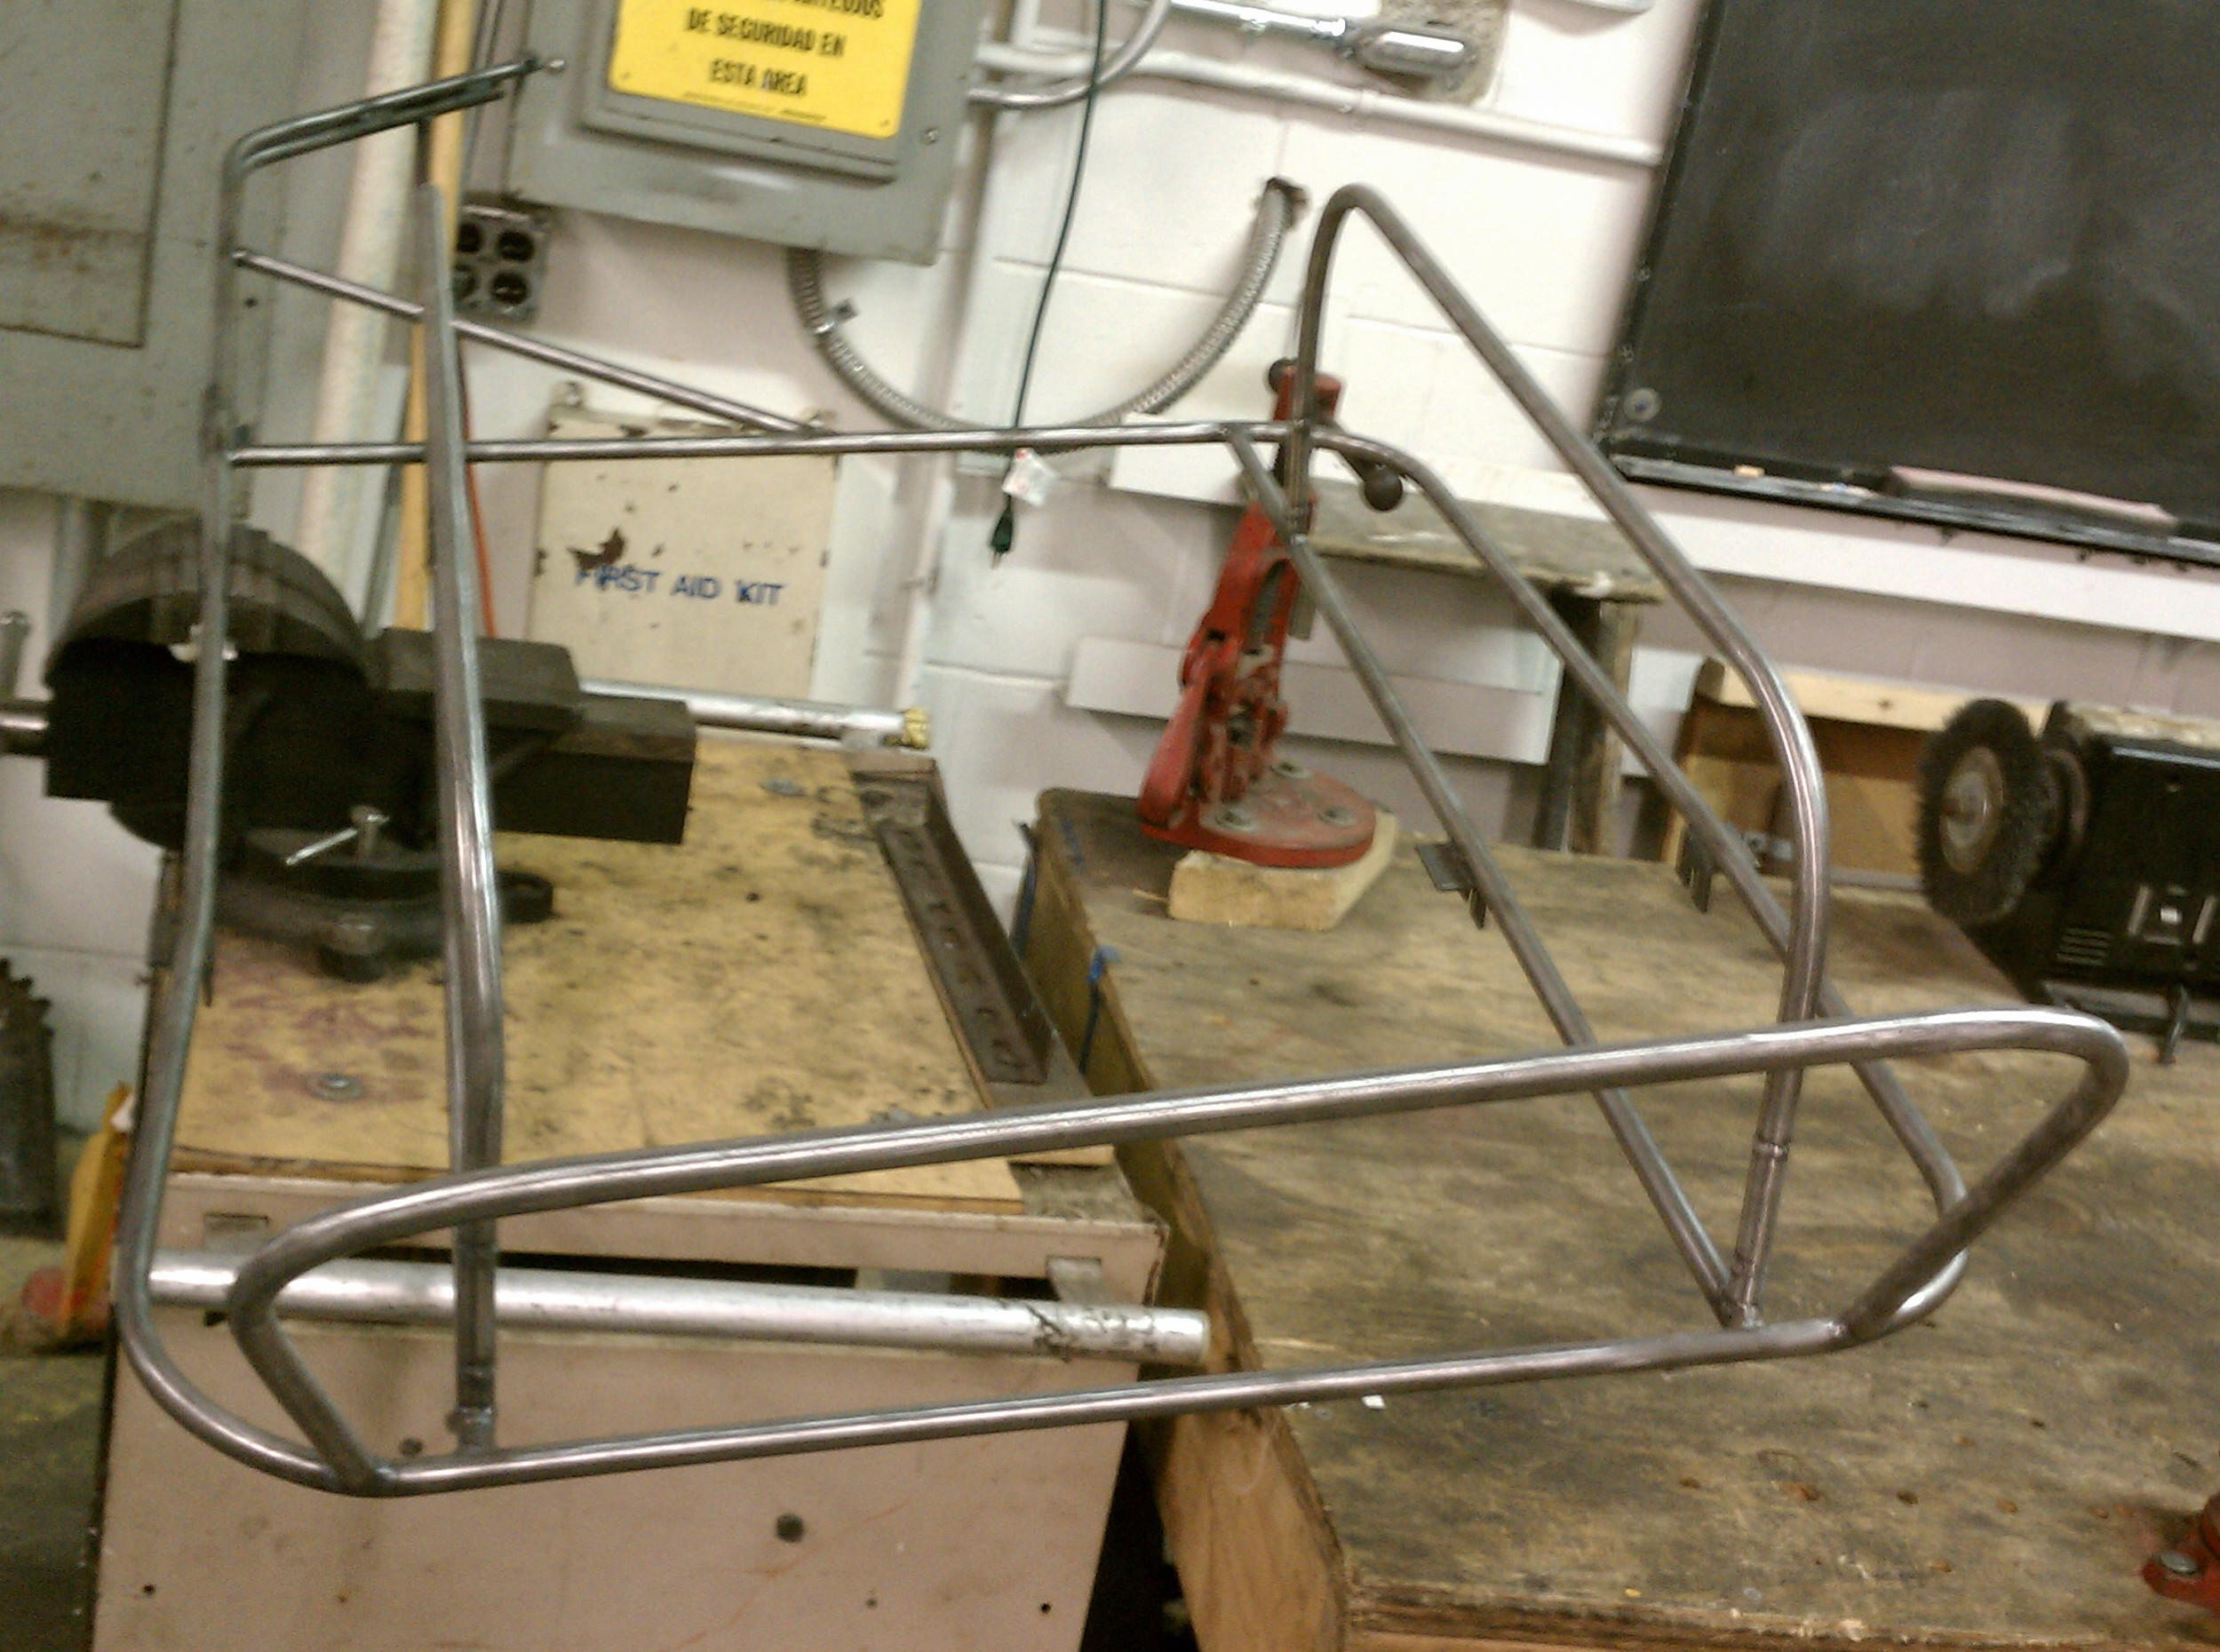
I proceeded to bend the main frame into Steve Jobs’ favorite shape, a rectangle with rounded corners, and left enough extra tubing sticking out to form the trailer arm. I added straight tubing for wheelwells, and welded it all up. Shown here is the flat, welded bed, with a threaded rod on top of it:

That threaded rod is a dropout jig. It holds the dropouts — which are just carefully cut pieces of angle iron — in the correct place so that when the dropouts are welded to the frame, the axles from the two wheels will be aligned with each other. Here’s the jig, clamped to the frame, with the angle iron dropouts positioned properly during welding:
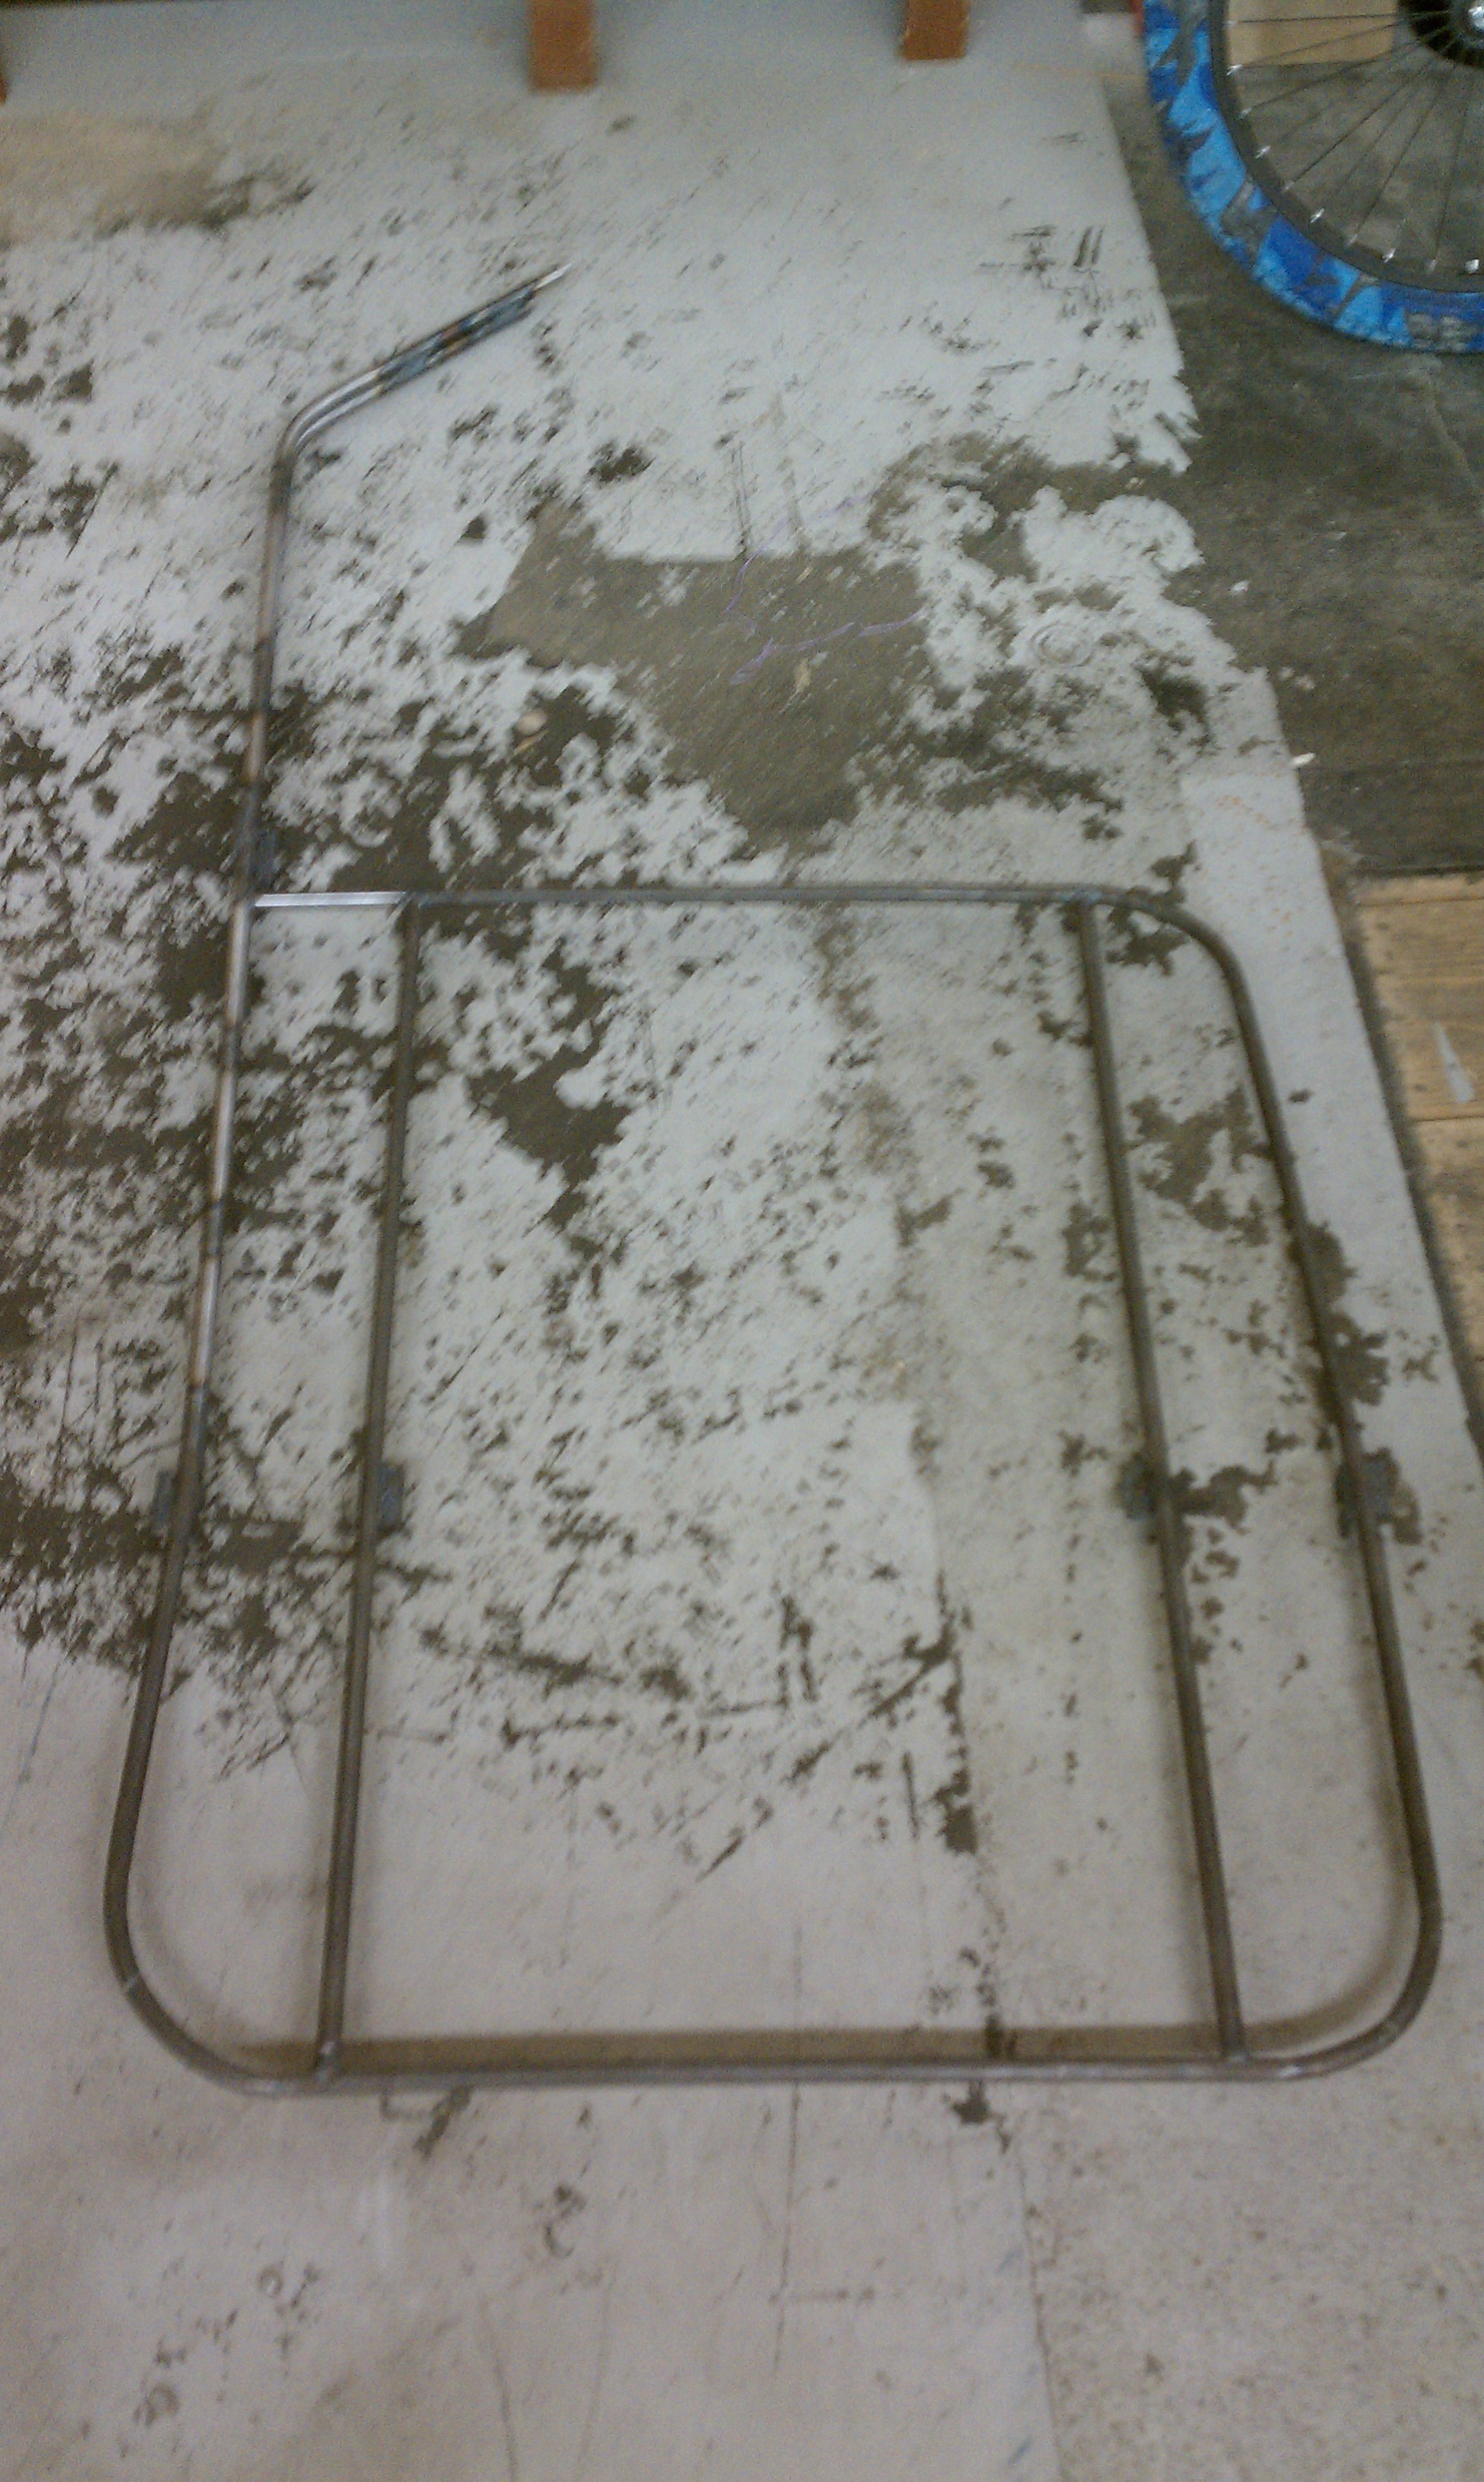
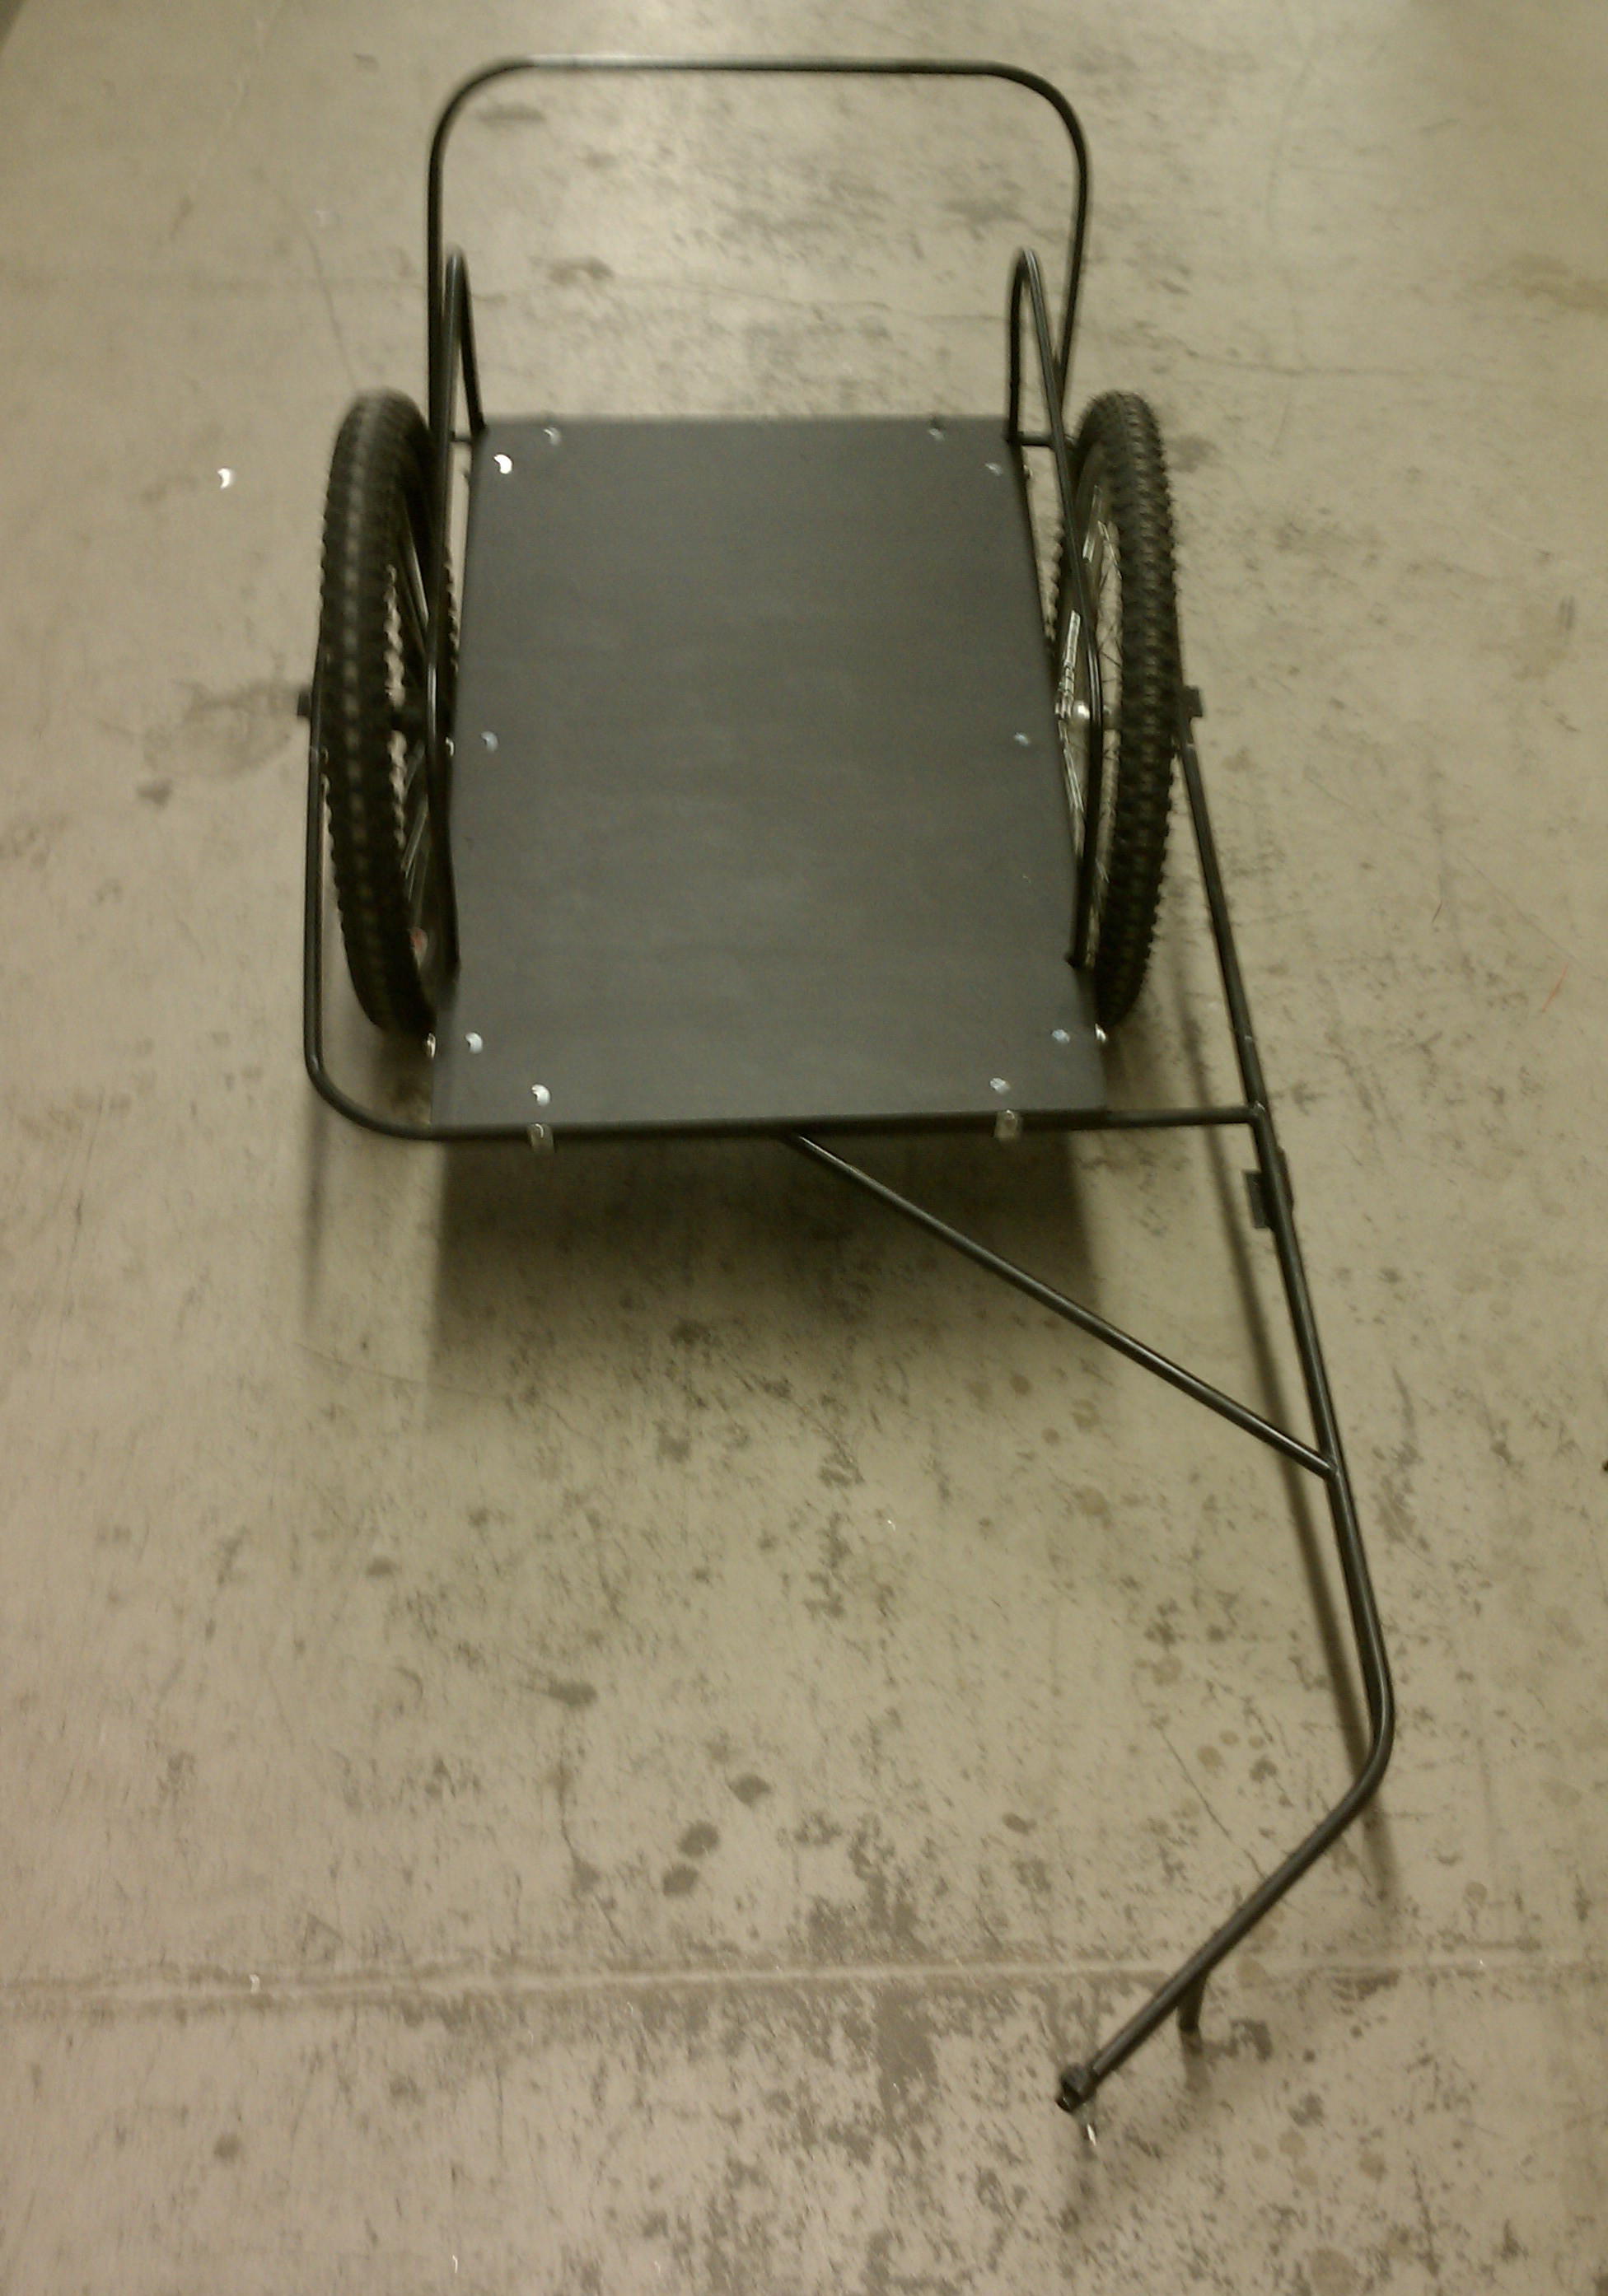
And here’s the completed main trailer frame, with wheelwells and dropouts. The next step was to add an extension to the trailer arm and reinforce the pulling arm with a second piece of short tubing:
I also bent and welded tubing into two large wheel guards to help prevent cargo from getting stuck in the wheels. The next step after this was to sand the entire frame down in preparation for painting. 4130 steel tubing is coated in a tacky grease so that it doesn’t rust — primer paint won’t stick to that grease:
After the frame was sanded it was time to paint it. I used lacquer-based spray paint designed to stick to metal and provide some rust-proofing. This was a mistake — the lacquer-based paint is too soft and it chips too easily, especially for use on a trailer, which is exposed to a lot of rough handling. I did add multiple coats, though, so when it chips only the top layers tend to chip off. This has been easy to fix with touch-up paint. If I had to paint this again, I would use a two-stage auto paint, which is harder to apply but much more durable, or get it powdercoated if I could find a way to powdercoat it affordably. Painting really improved the trailer’s appearance:

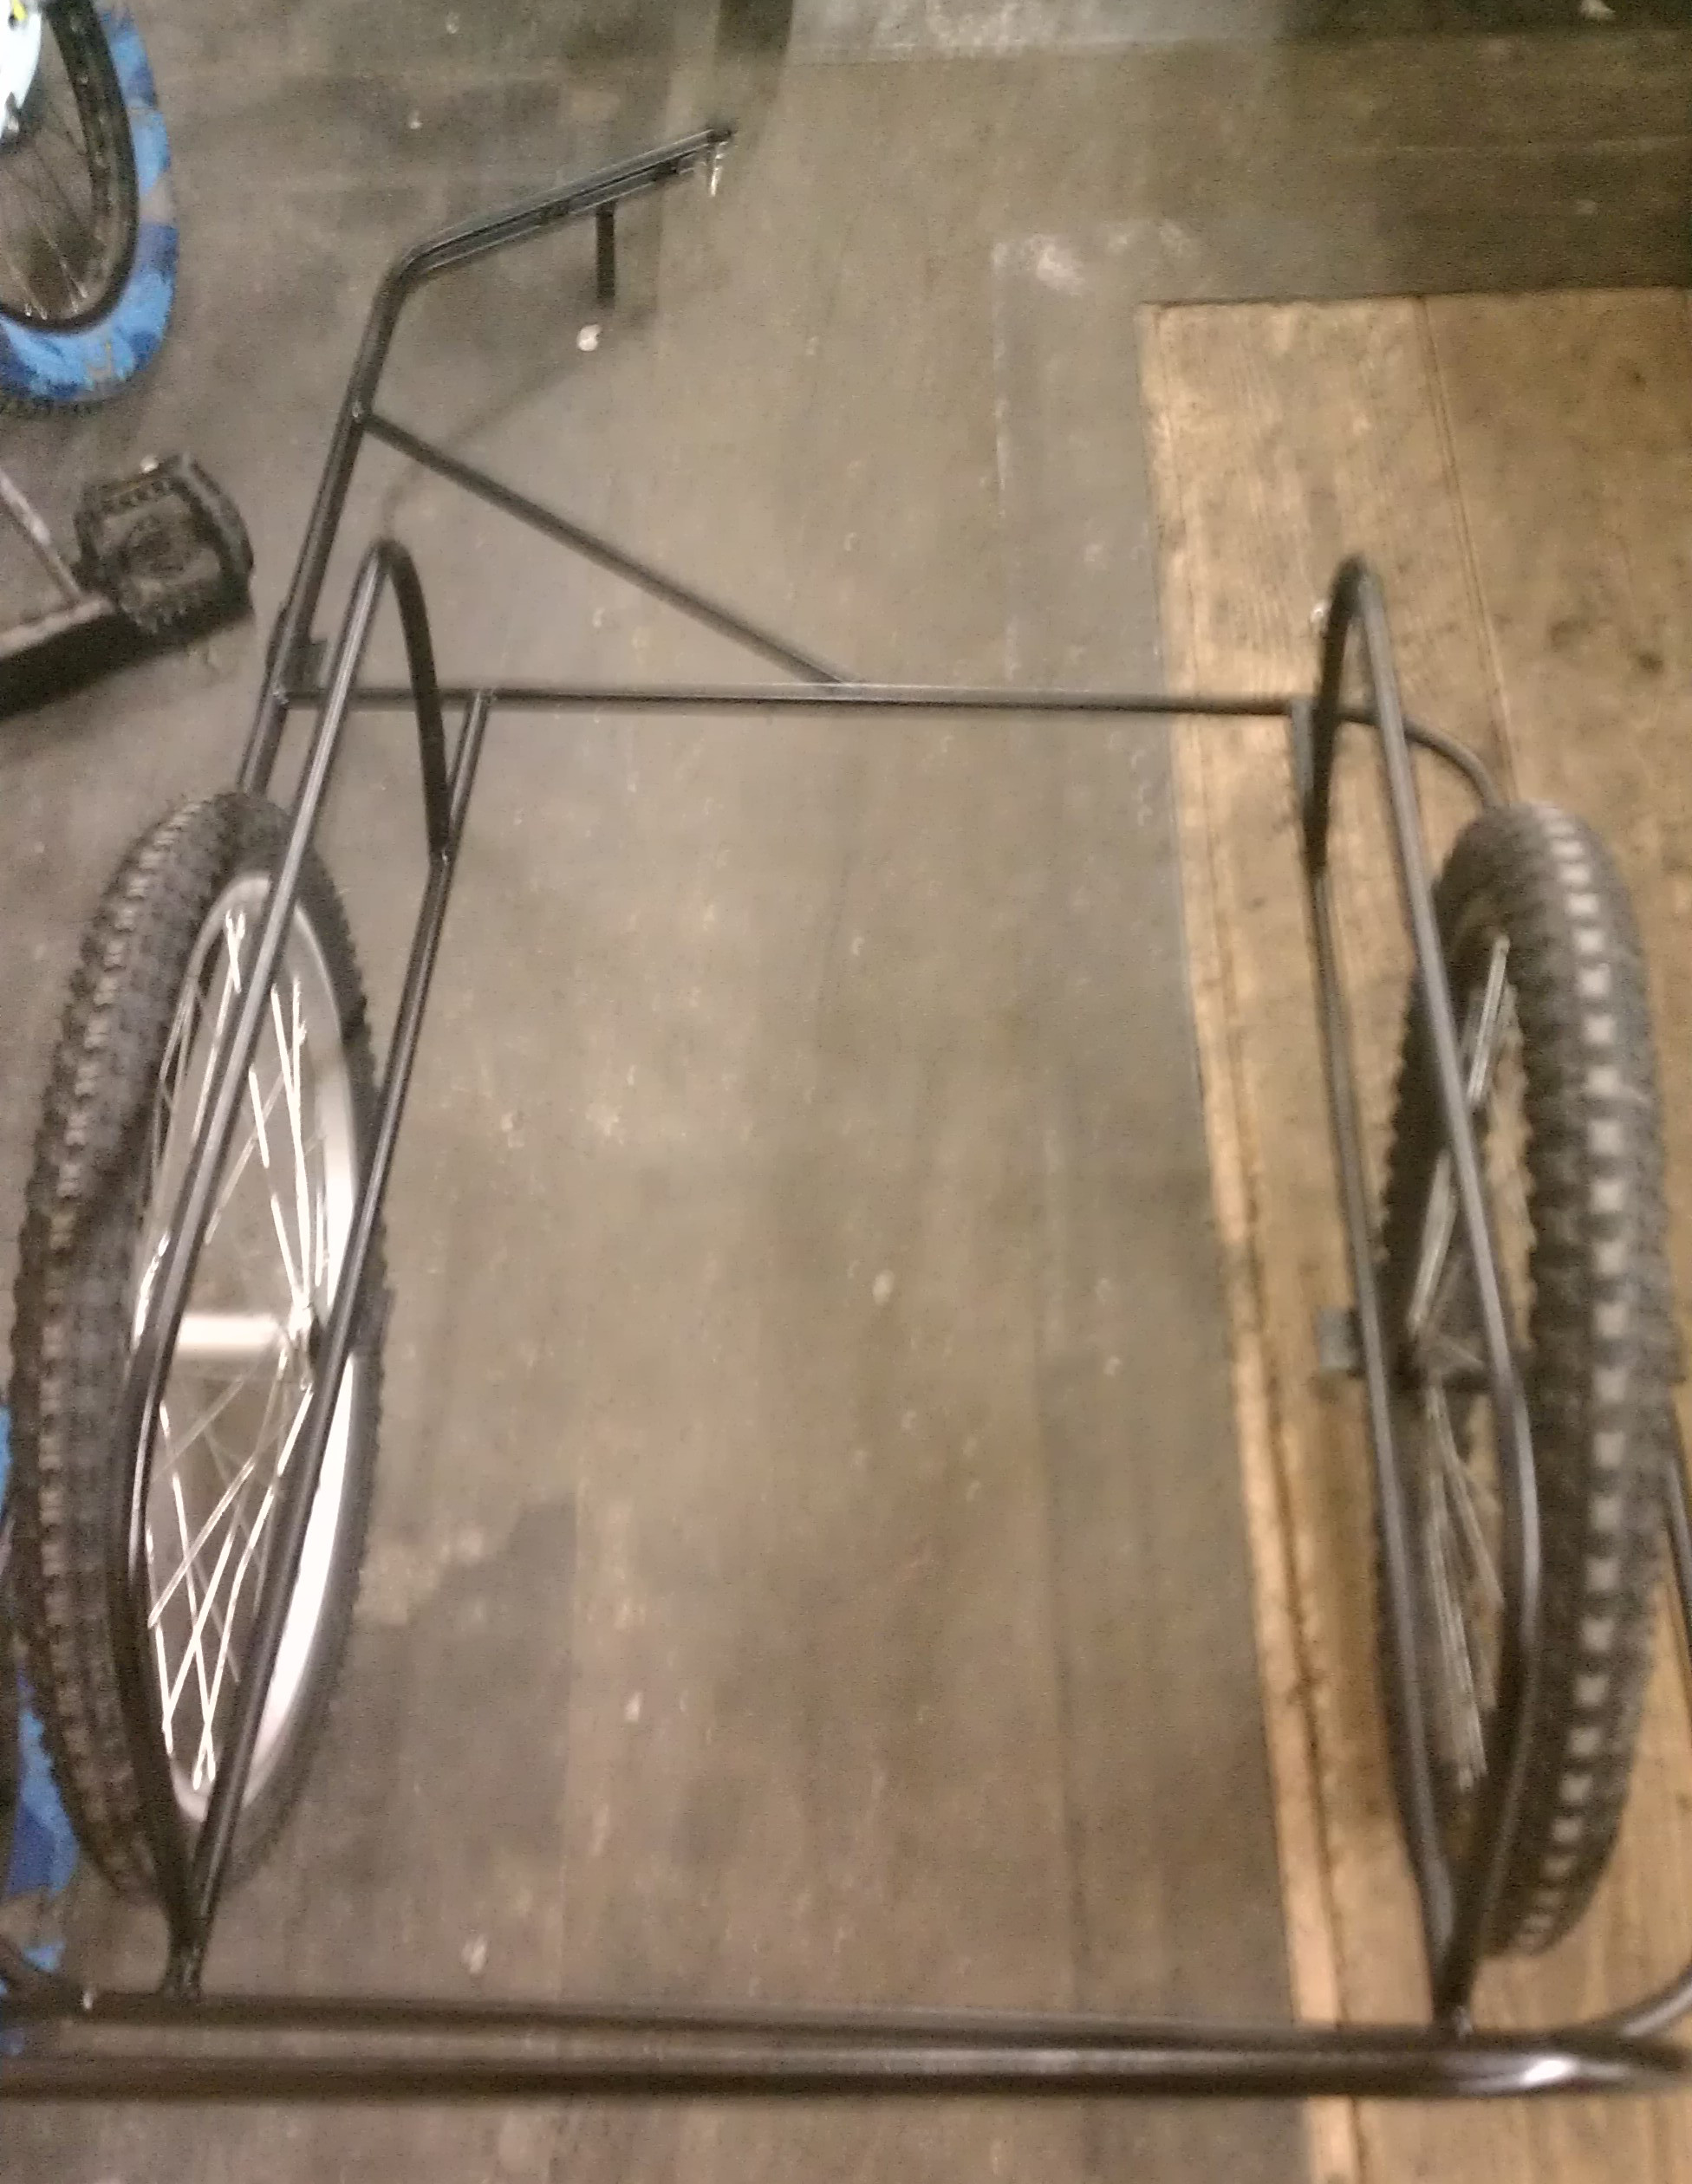
Next it was time to test-fit the wheels. I apologize for the photo quality, but hey, it’s enough to get the picture, har har. Everything fit right the first time!
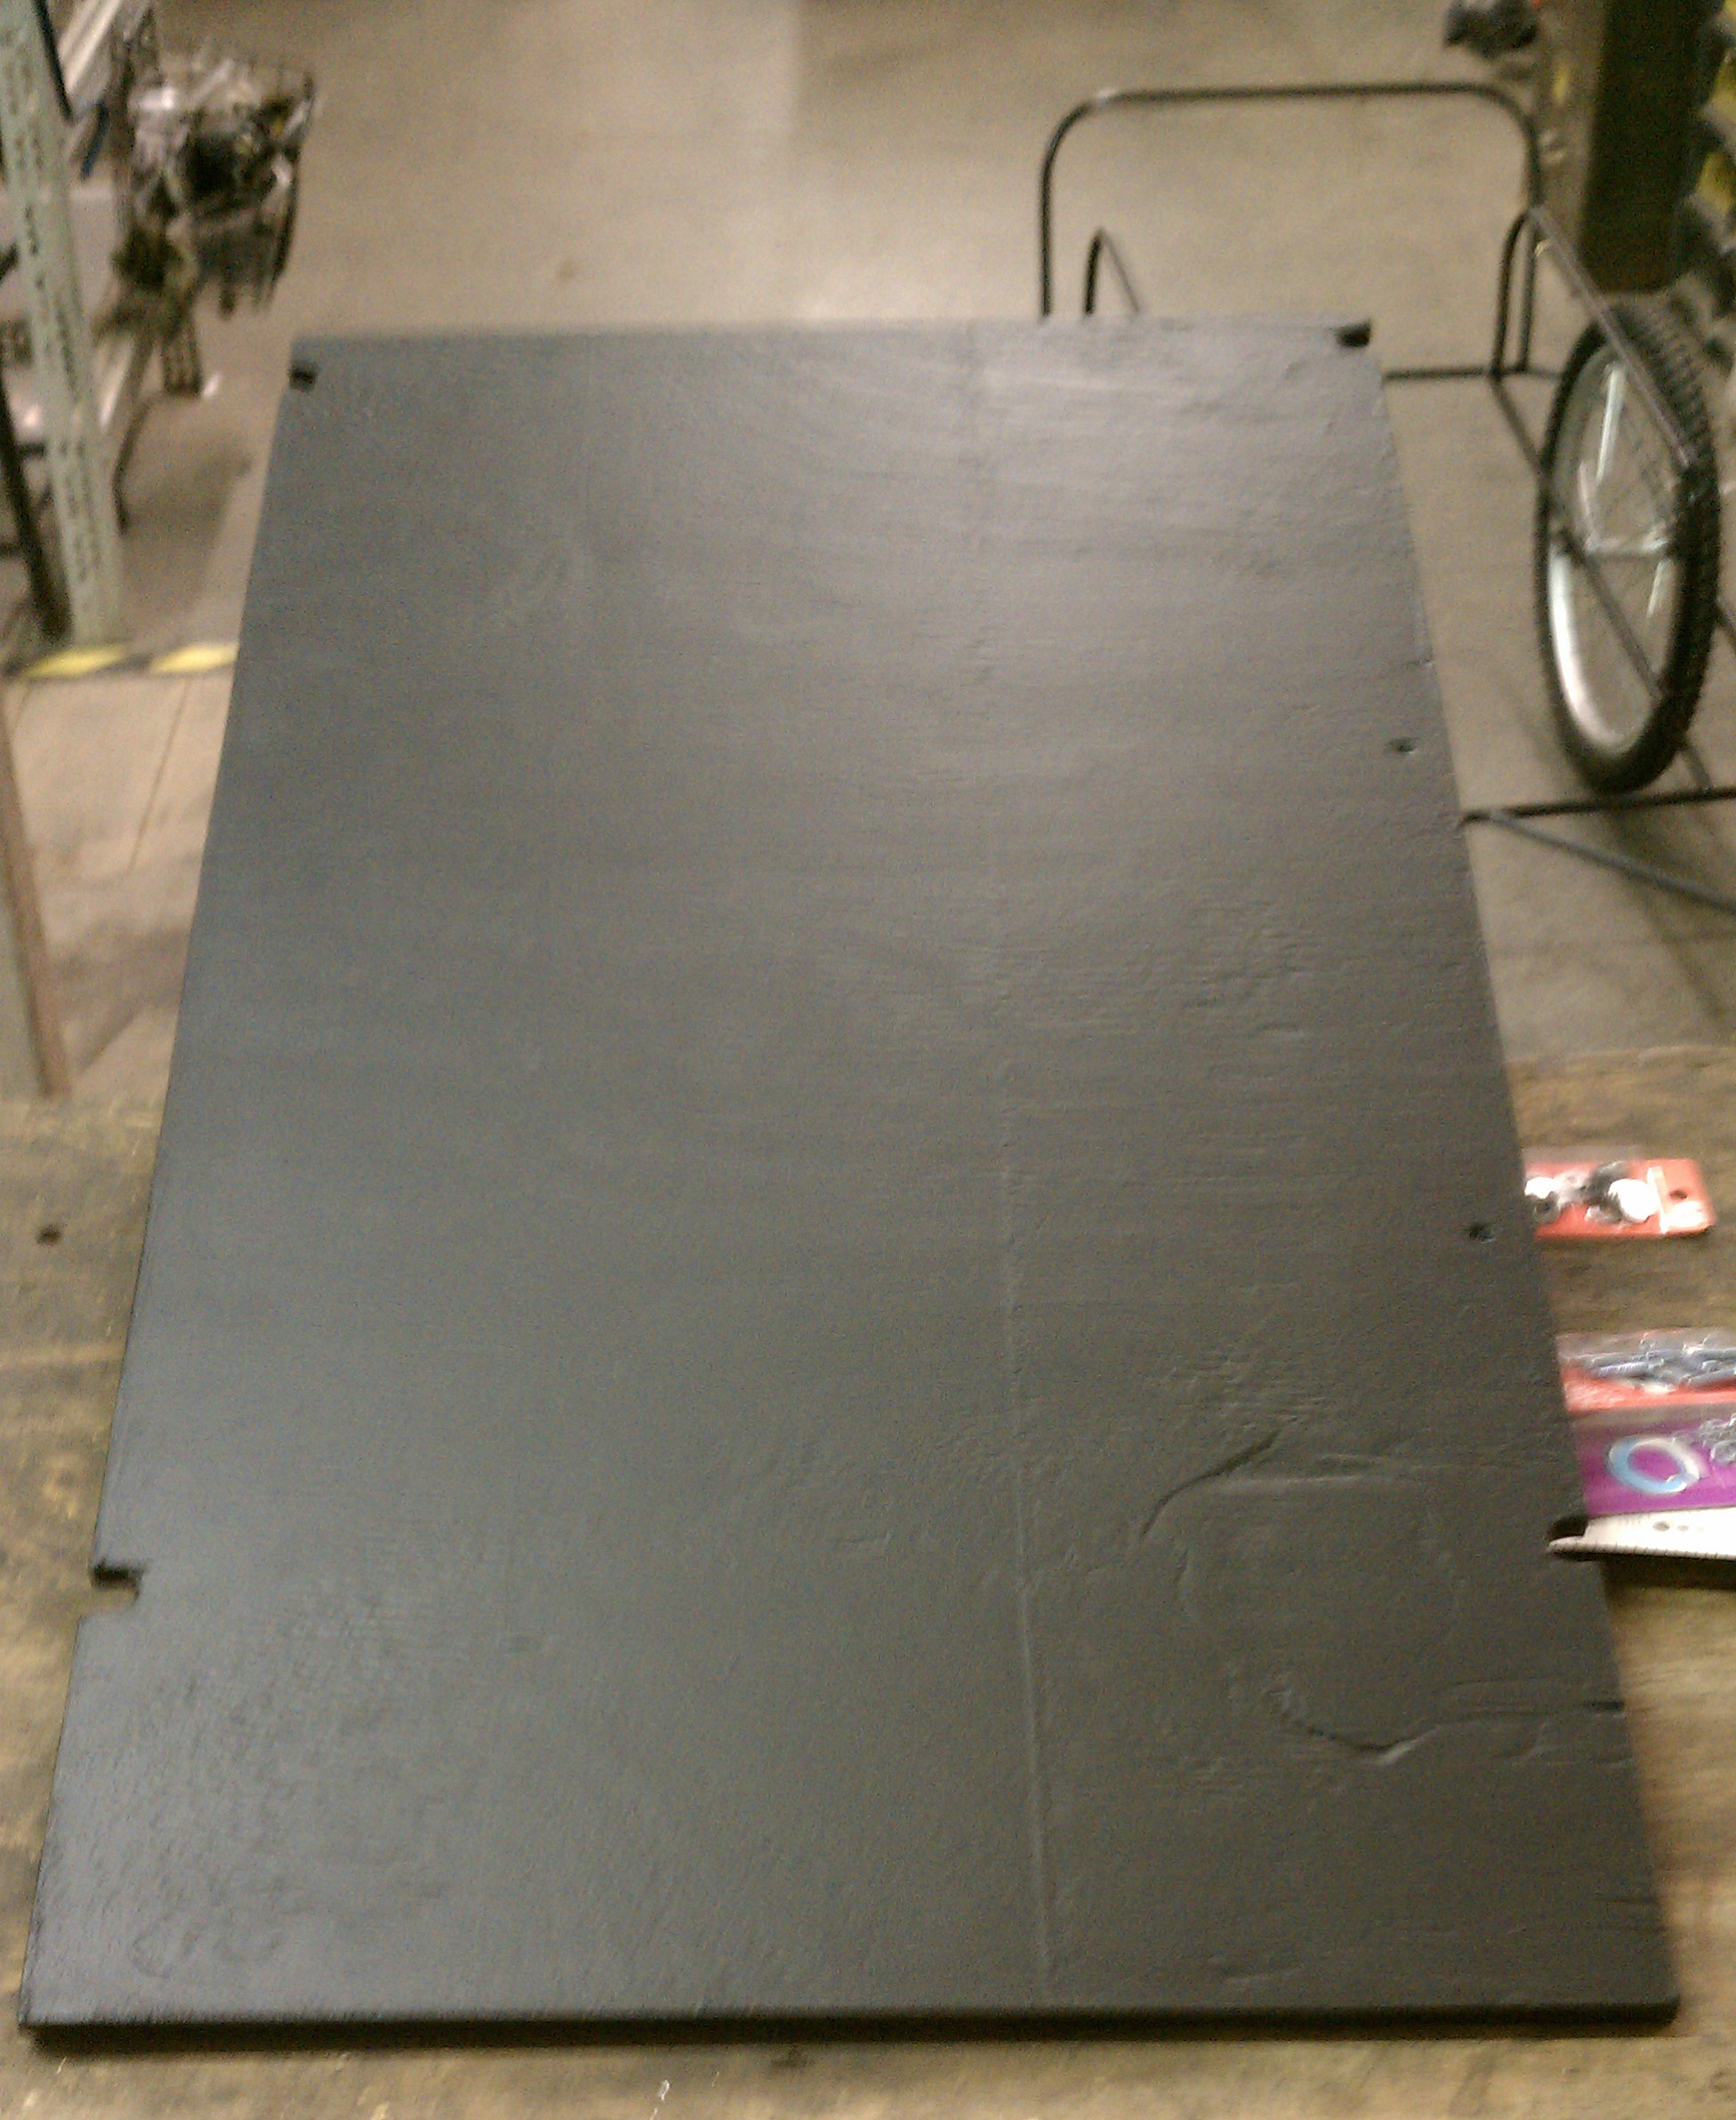
I then use some scrap 1/2″ plywood to make a wooden deck. I painted the plywood with exterior deck paint for water resistance:
The next step was to clamp the deck in place while I attached it to the trailer with conduit clamps. Here I’ve used wood clamps to hold it in position and have installed two of the conduit clamps to attach the deck to the trailer frame:
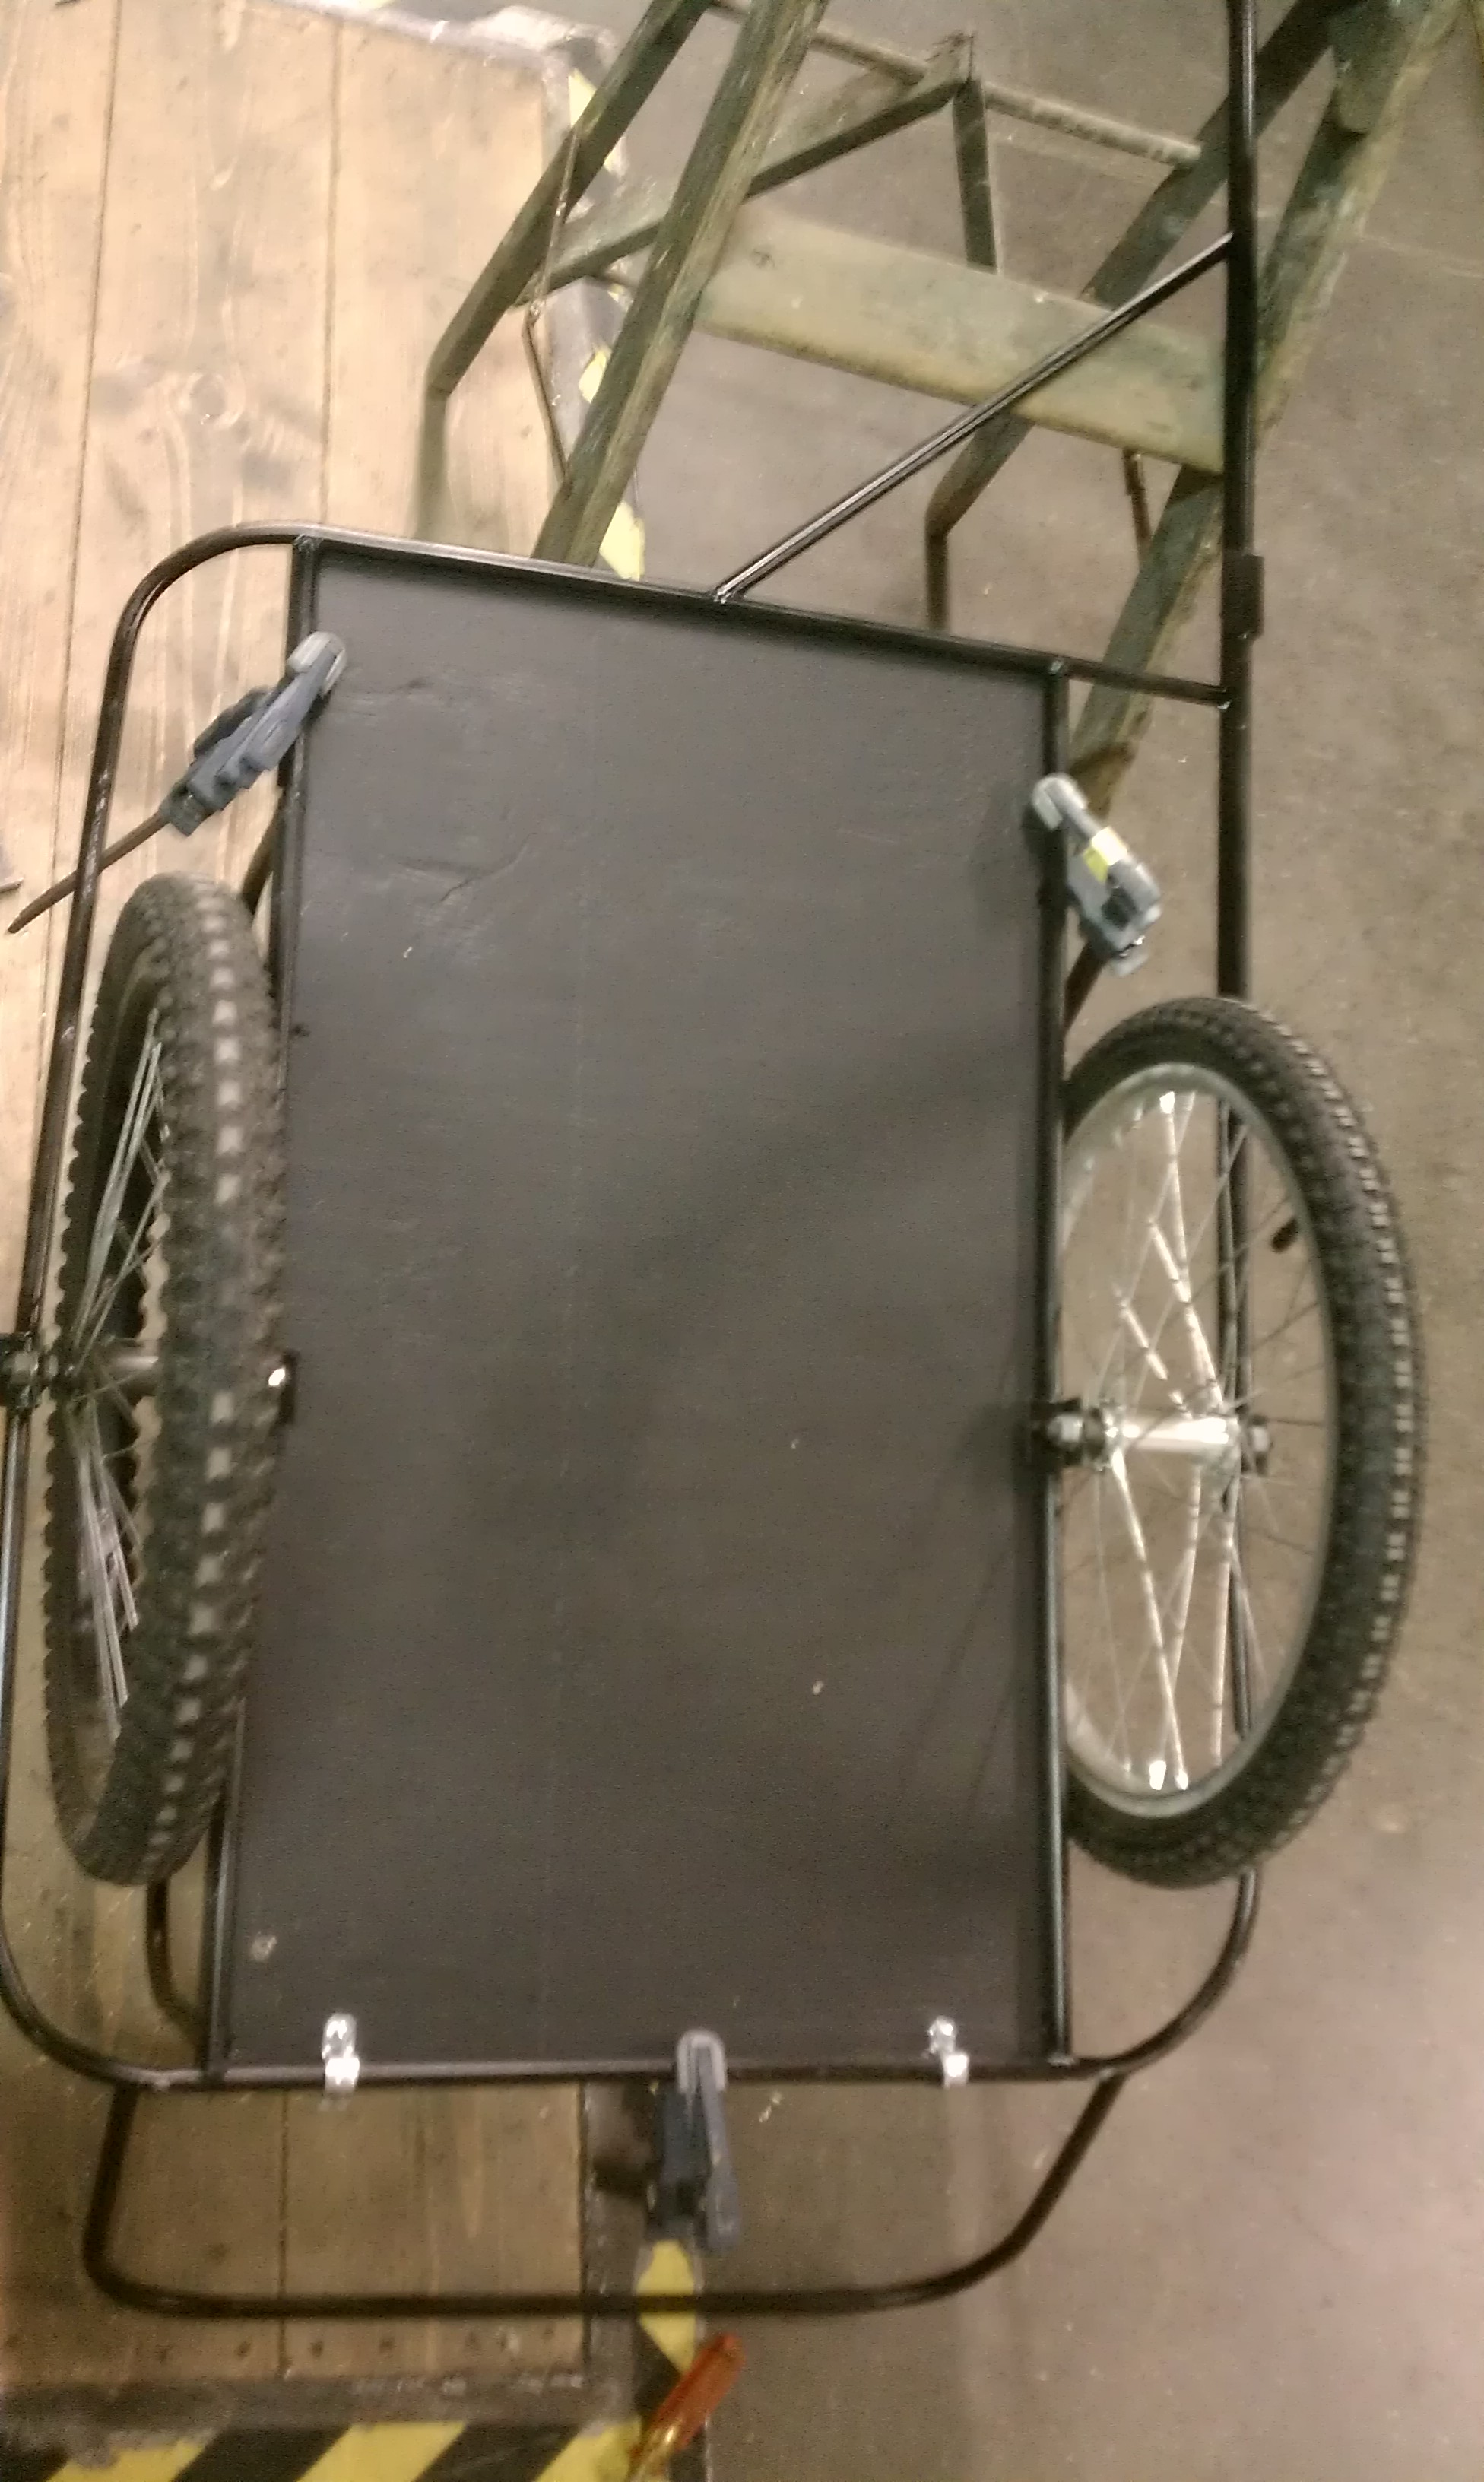
After installing all the clamps, the trailer was functionally complete!
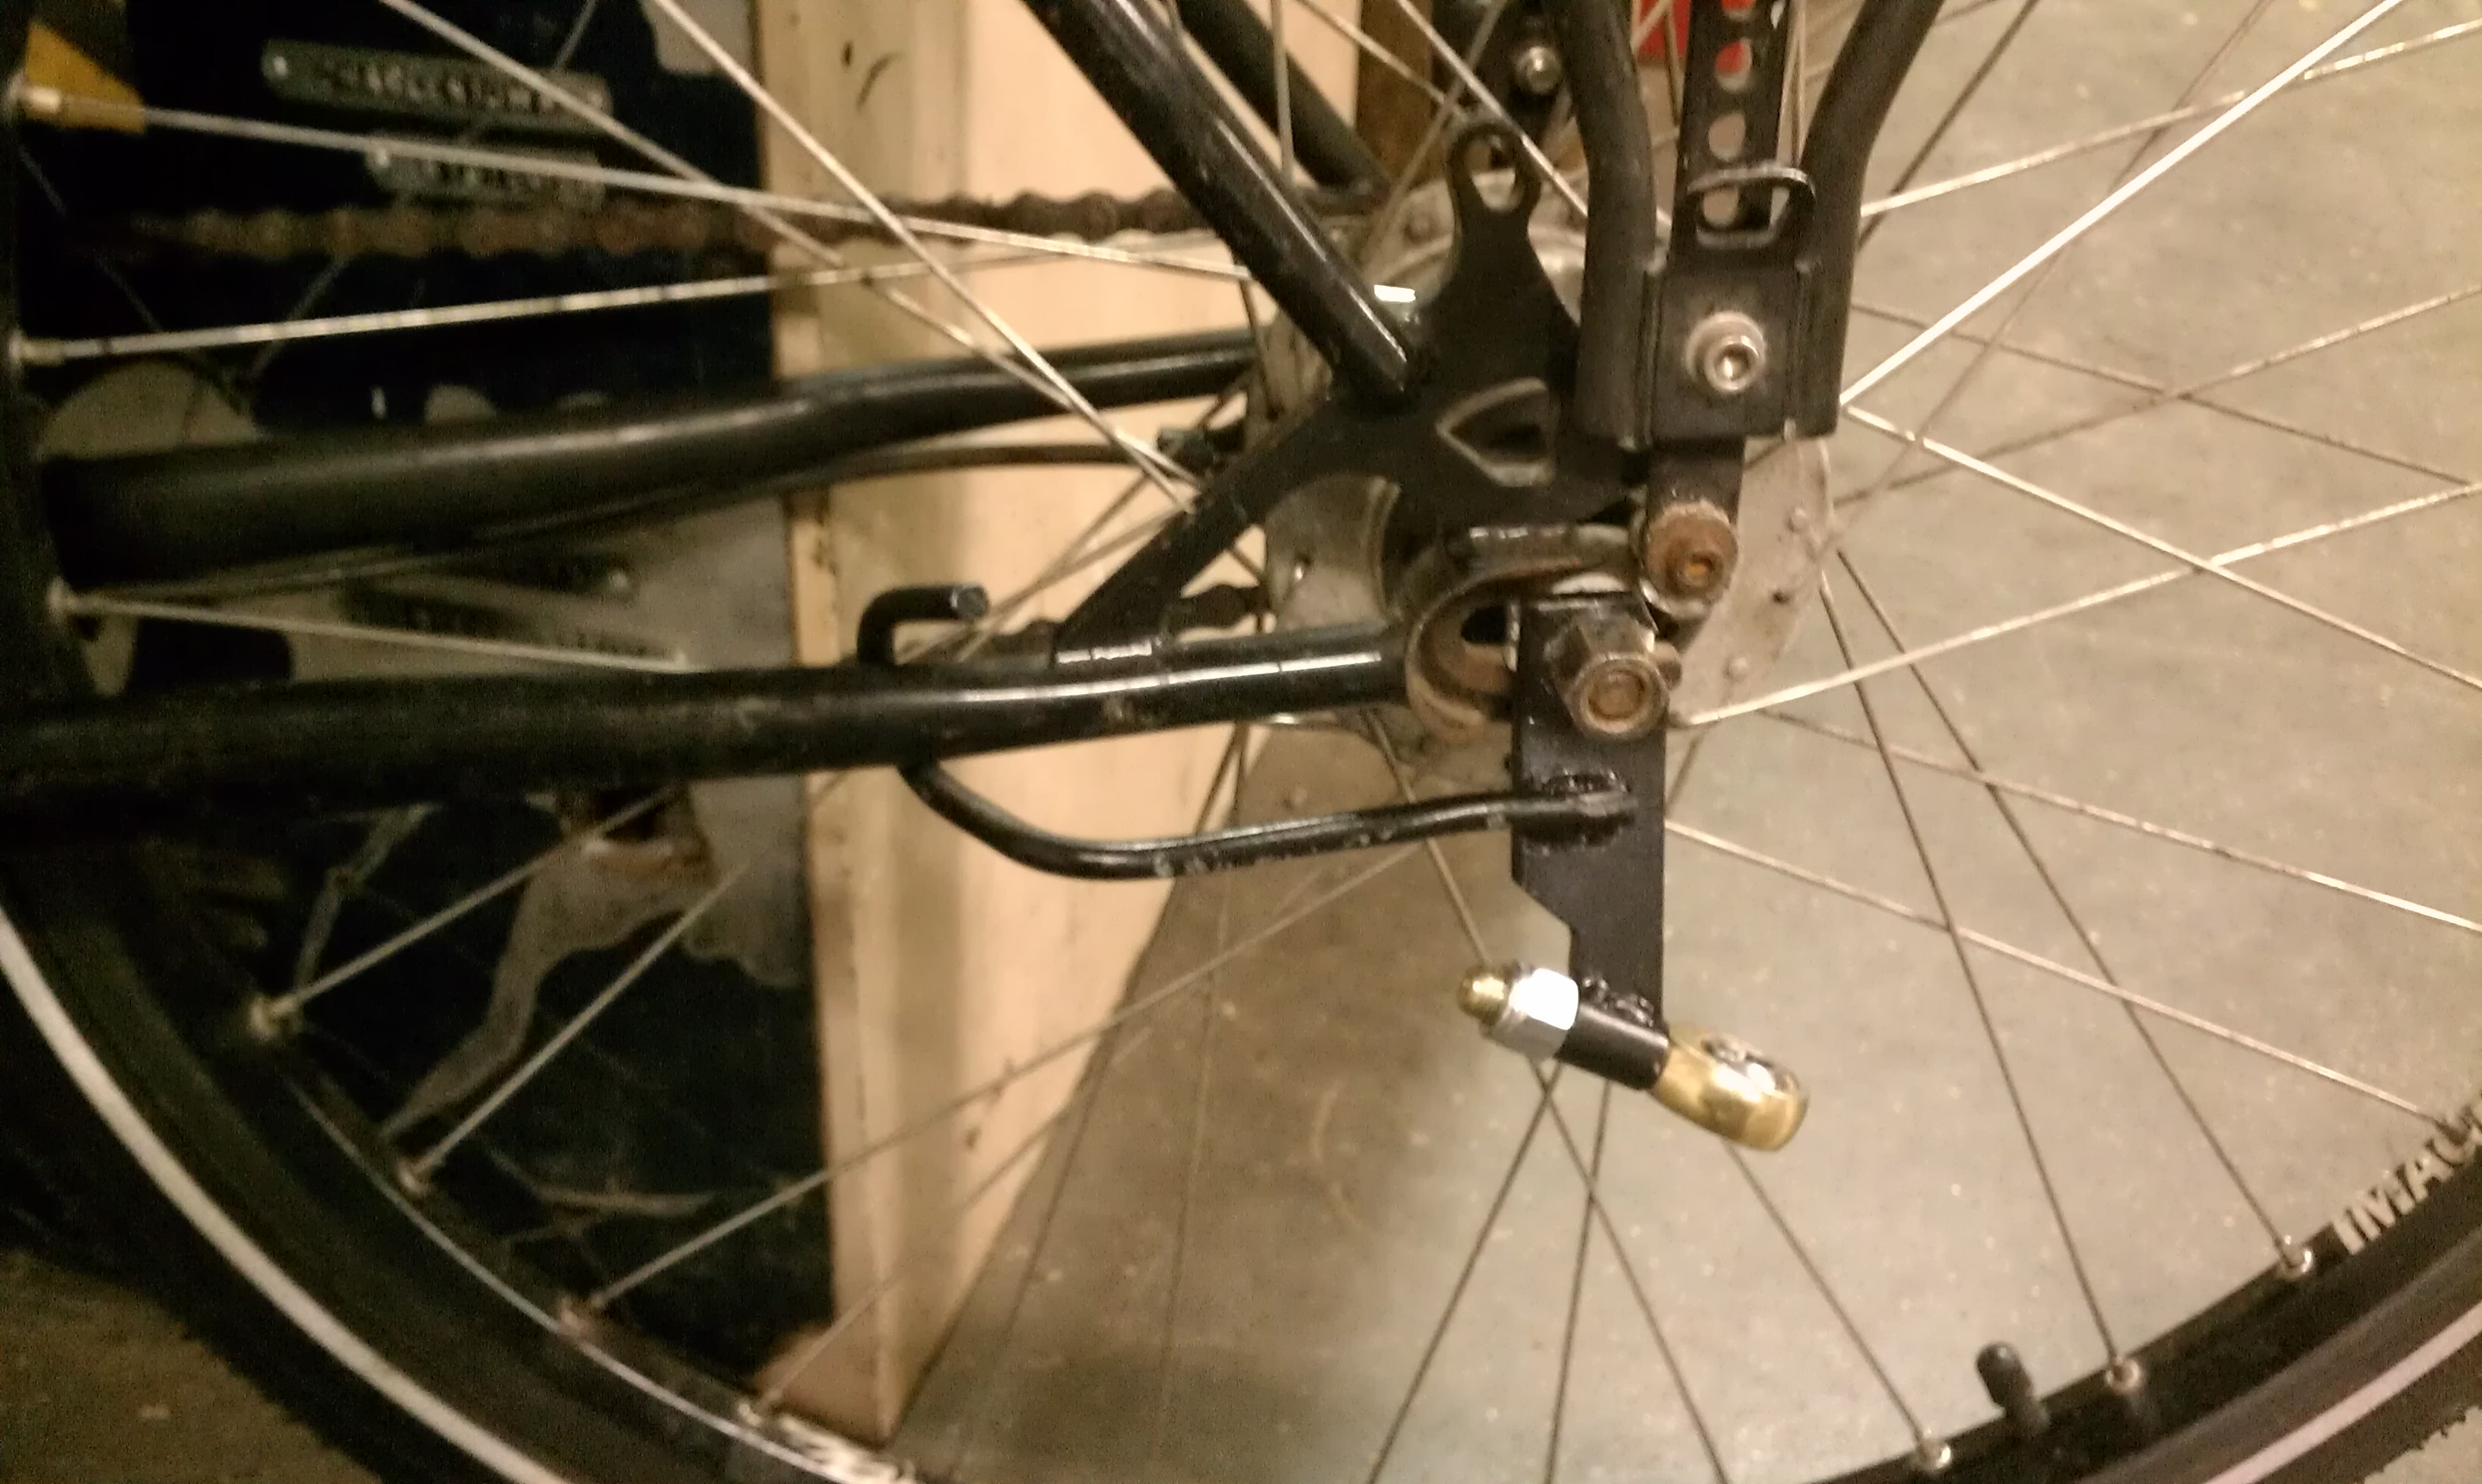
The next step was to fabricate the hitch. I don’t have any photos of the hitch-building process, however, it’s outlined in detail in the plans. In short, it involved cutting down and bending some flat steel stock, attaching a round tube and a hook to it, and attaching a rod-end ball joint to the hitch. Here’s a closeup of the completed hitch. The hook that wraps around the chainstay helps distribute the load from the trailer’s movement:
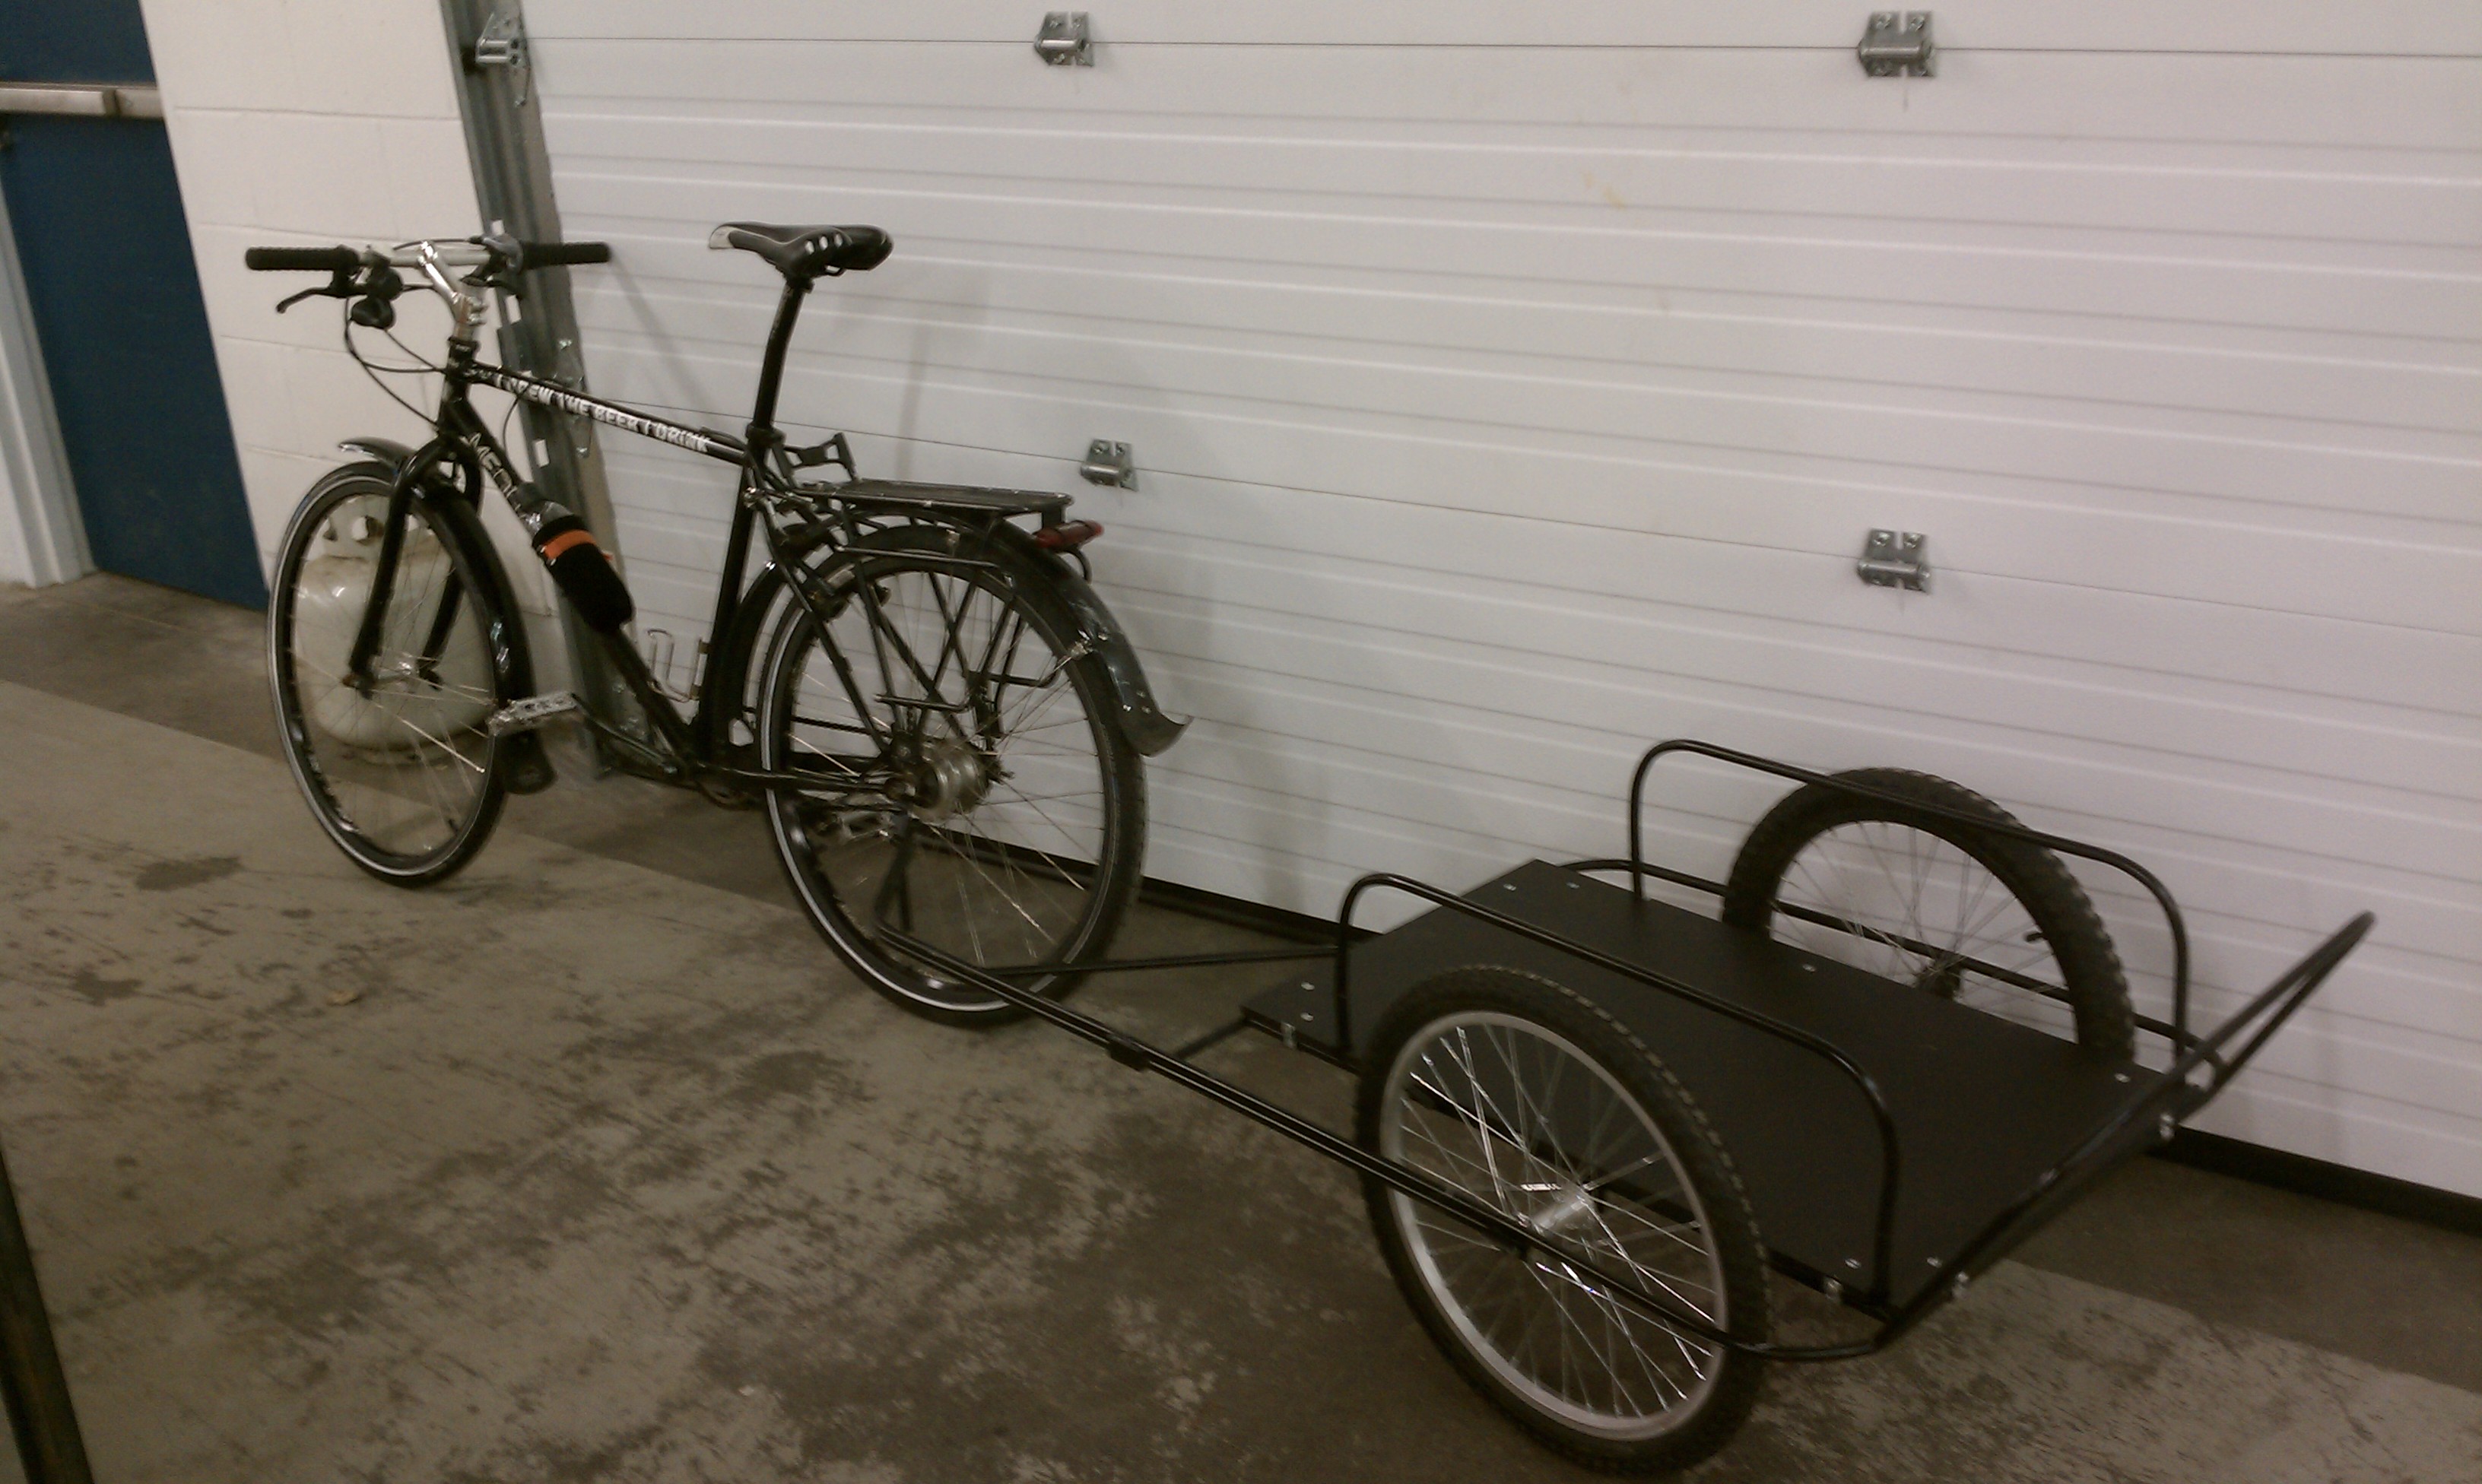
Here’s the trailer attached to my bike! I’m really happy with the way it turned out:
I ended up adding sidewalls later since the wheel guards weren’t enough to keep certain types of cargo from getting caught in the spokes of the wheels. If I built this again, I’d also add a few loops of metal in strategic locations so that bungee cords could be attached more easily. I learned a lot from this project, and had a great guide to follow!

